
If you’re looking to add a personal touch to your resin casting projects, silicone moulds are a great option. Not only are they relatively inexpensive, but they’re also easy to use.
Silicone is a great material for resin moulds because it is flexible and easy to release the cured resin from. Plus, it’s not as fragile as other mould materials, so it can withstand the high temperatures involved in resin casting. Here are a few simple tips for getting the perfect resin cast.
Choose the right resin for casting
There are a lot of different types of resin available on the market so I’ll always make sure I choose one that’s specifically designed for casting. Otherwise, you may not get the desired results.
Why using good quality resin is important:
- Prevents bubbles from forming
- Ensures a smooth surface
- Creates a strong bond
- Gives you a professional finish
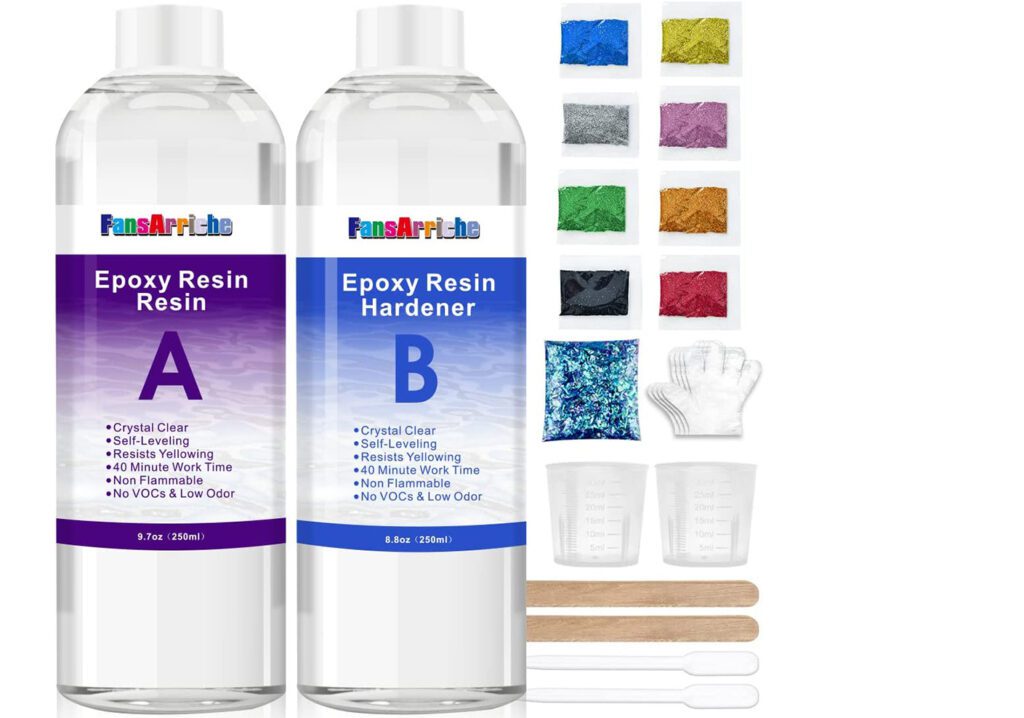
I use 1:1 ratio epoxy resin from FansArriche, which comes in 2 bottles, Part A (Resin) and part B (Resin Hardener). This resin kit is so easy to use by just simply mixing equal amounts of both part A and part B, giving you a 40 minute working time.
Prepare your silicone moulds for resin casting
Before you start pouring the resin, it’s important to make sure that your moulds are clean and dry. Otherwise, the resin may not adhere properly. Check out this post with my tips on how to store and look after your silicone moulds.
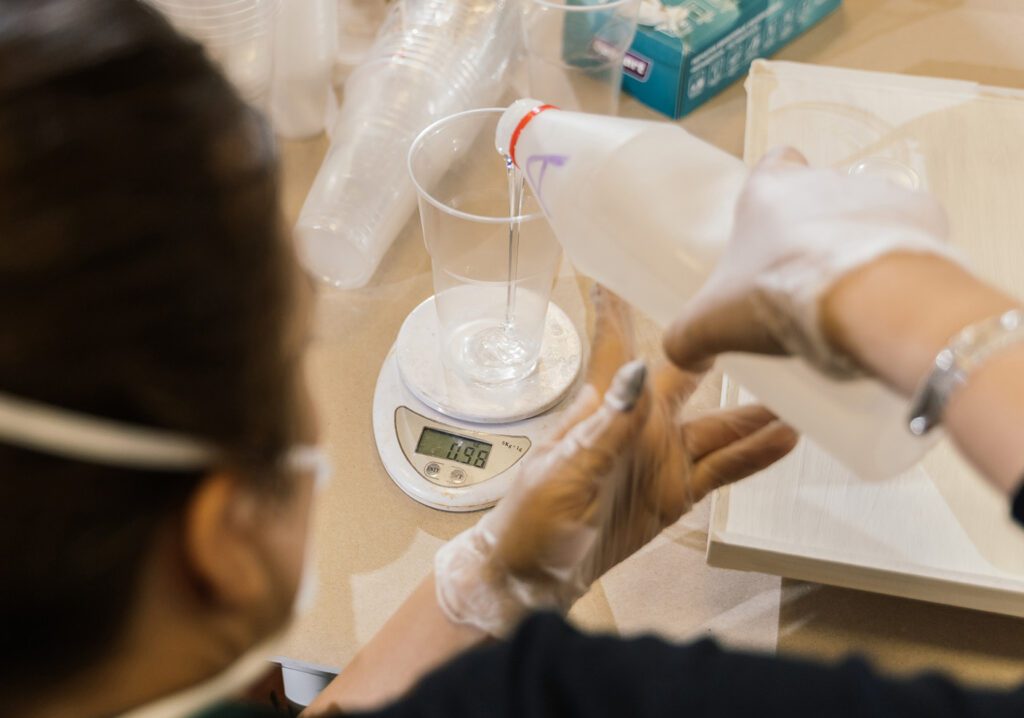
Measure accurately
When measuring out the resin, it’s important to be precise. This will help ensure that your casts are consistent in size and shape. Avoid making any mistakes by always referring to the manufacturer’s instructions, which will usually involve mixing equal parts of the resin and hardener.
Pour slowly and evenly
Once you’ve measured out the resin, pour it slowly and evenly into the moulds. Be careful not to pour too quickly or you may end up with air bubbles in your casts. However do not worry if you do have a few bubbles as these can easily be removed with a heat gun – just one of the tools you’ll need getting started with resin.
Extra tip: When using a heat gun make sure to keep it moving so your piece doesn’t get too hot.
Let the resin casting cure
After you’ve poured the resin, let it cure for at least 24 hours before removing it from the moulds. If you try to remove it too soon, the resin may not be fully set and could break easily.
Once cured, remove the resin piece from the mould by gently flexing it until the piece pops out. If necessary, use a sharp knife or pair of scissors to carefully cut around any edges that are sticking to the mould.

Resin casting is a great way to add a personal touch to your projects. By following these simple tips, you’ll be sure to get perfect casts every time!
If you’re feeling extra creative, have a go at making your own silicone mould.


