
Are you a fan of dragons and mythical creatures? If so, then you’ll love this tutorial on how to make a polymer clay dragon! With just a few simple materials and some basic sculpting techniques, you can bring your very own baby dragon to life. Whether you’re a seasoned crafter or a beginner looking for a fun and creative project, this tutorial is perfect for you.
So, let’s get started and unleash your inner artist as we explore the magical world of dragons!
Getting Started
Here’s what you’ll need to make a sleeping baby dragon:
- Polymer Clay
- A tile (or something oven safe)
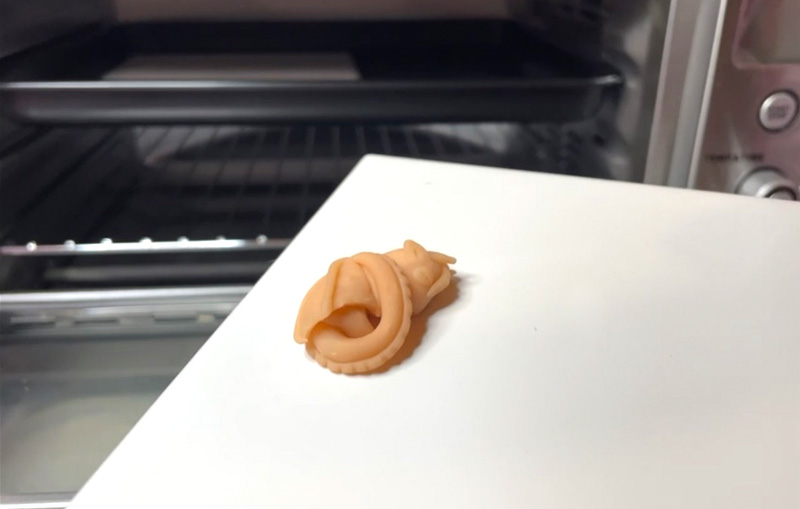
Polymer Clay Dragon Step by Step
Build the dragons body
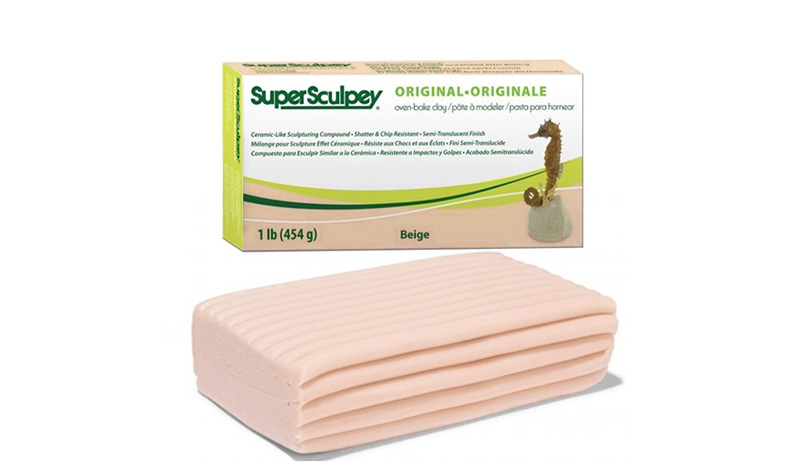
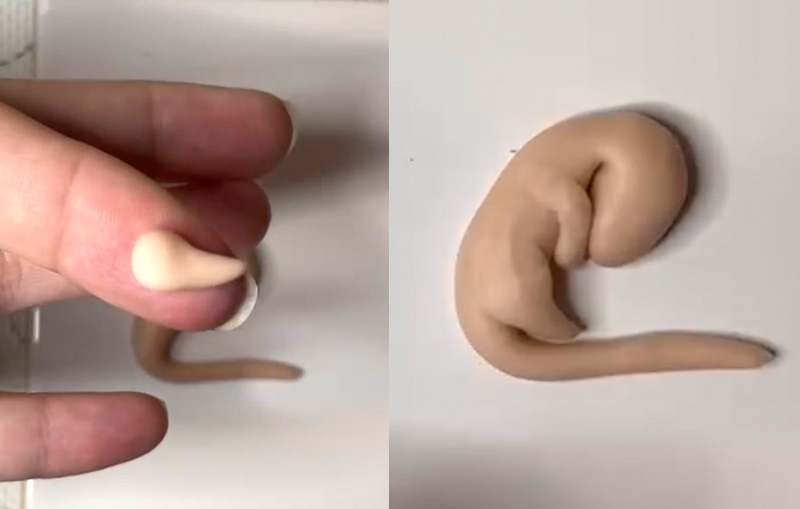
Take some of your clay and soften it with your fingers. I like to use SuperSculpey…. It’s soft and easy to work with. It has the added benefit of being the skin tone of a unborn developing baby dragon in an egg.
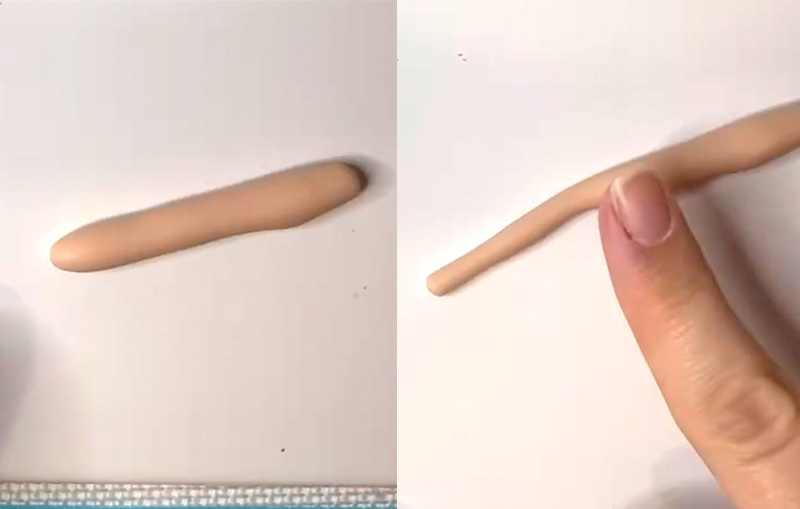
Roll into a thick sausage. At one end create a longer thinner sausage which will form the tail. You can cut the tail to your desired length if it’s too long.
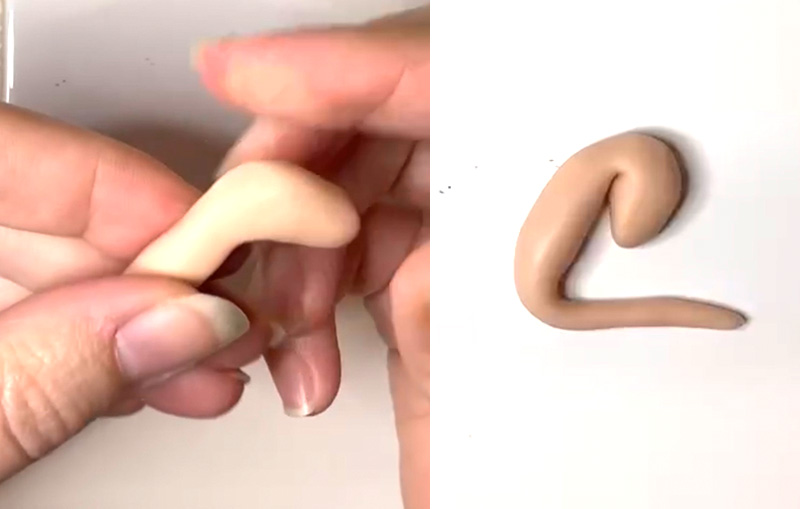
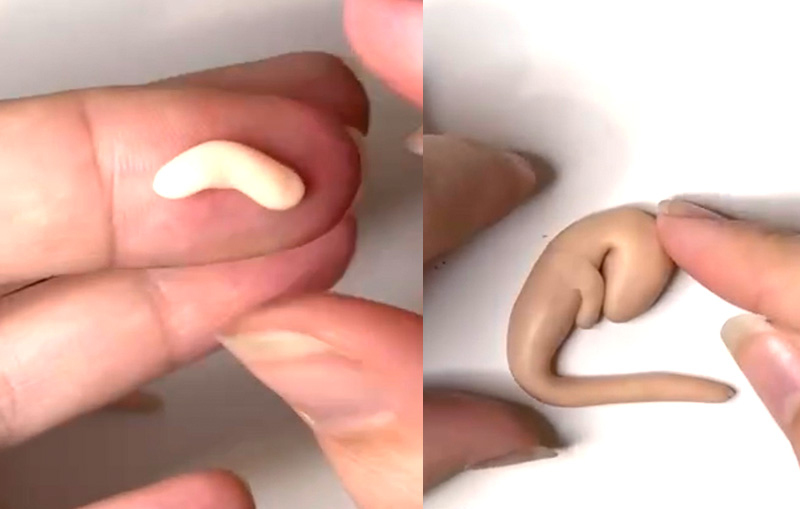
At the other end create a triangular shape and bend it forward to make the head. You want it to look like the dragon is curled up. Simply wrap the tail around or over the body.
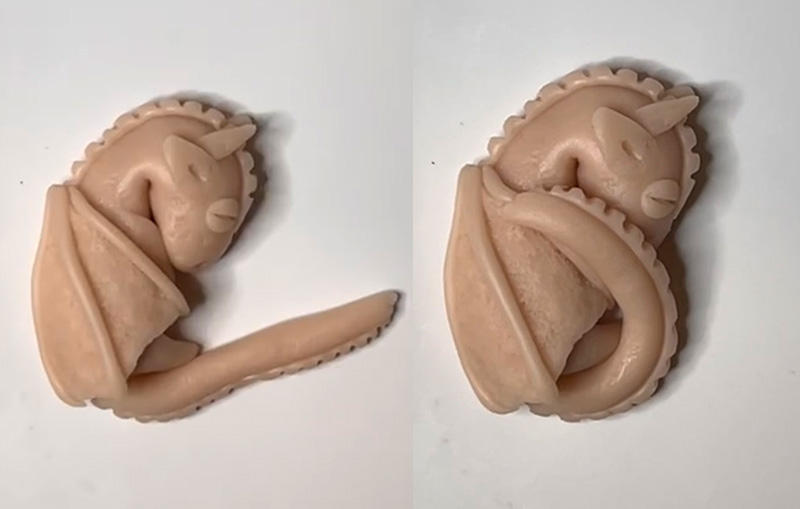
Creating the polymer clay dragon legs
For the front leg, roll some clay to the size of a piece of rice. This isn’t important if you want your dragon to have large wings.
To make the hind leg, roll a piece of clay into a ball. pinch 1/4 of it to make the foot and then press the piece to flatten it. You want it to look like a Q shape.
Attach it to the body.
Dragon head details
For the dragons head, I have created two little horns.
The ear is created from just a small triangle piece.
To make the eye, just roll a tiny ball of clay and place it onto the head. Add a line across the eye from some extra detail.
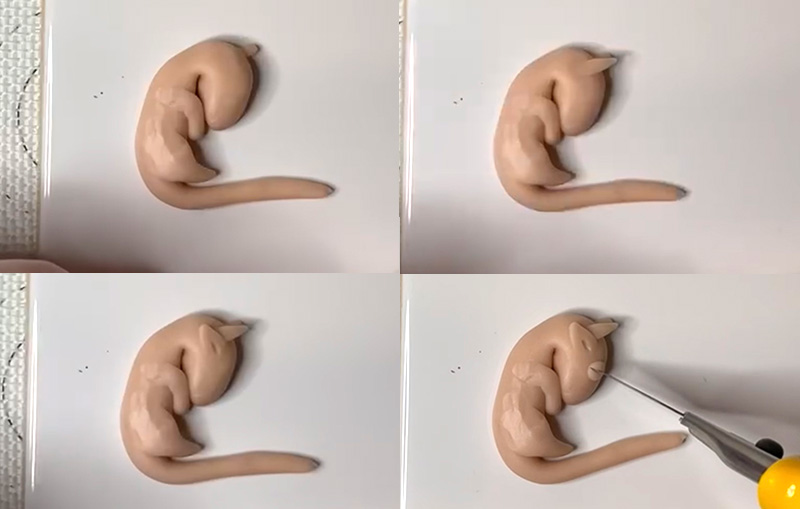
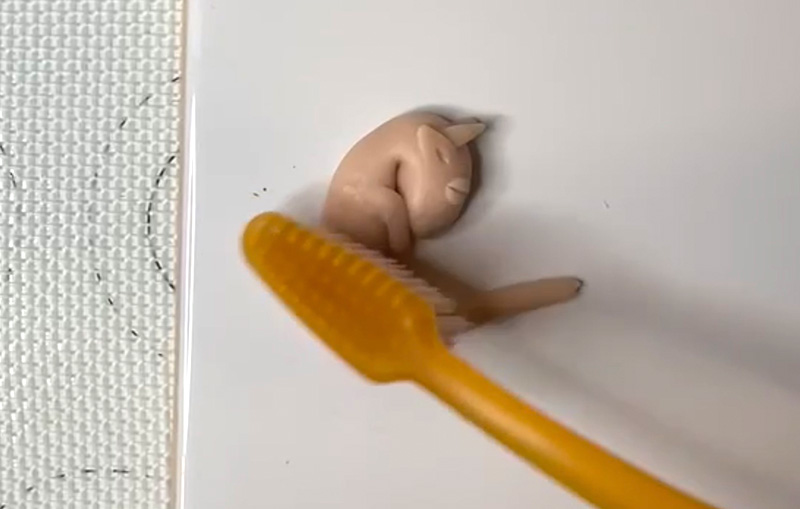
Now if you want to add texture now is the best time.
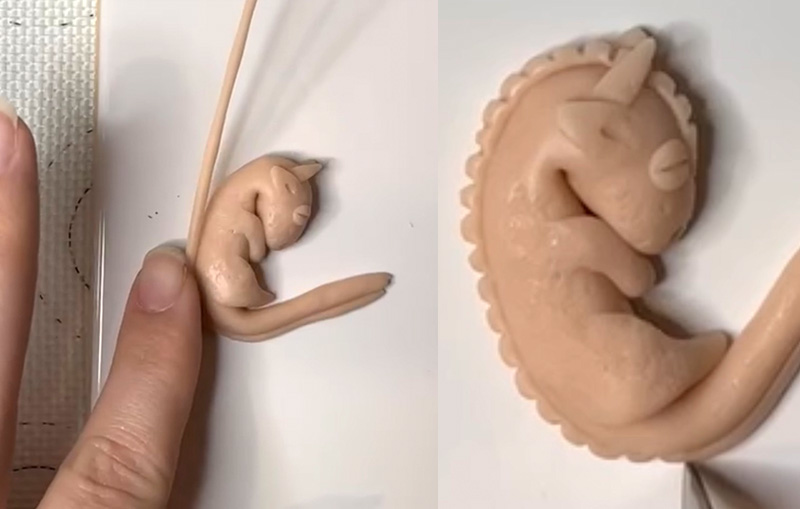
Dragon spine
To make the spine; roll a very thin sausage, much longer than the dragons body. Run it along the back of the dragon, starting from the tip of the tail all the way to the head (cutting off any excess).
Press grooves all the way along. This will also help secure it in place.
Dragon wings
For the wing; roll a piece of clay flat. Cut out a triangle according to how big you want the wing to be.
Cut out 2 semi-circles from the bottom. (Texture your wing at this stage but this is optional).
You should now have 3 points at the bottom and one at the top. Roll 3 thin sausages. Add each sausage from each point at the bottom meeting at the top.
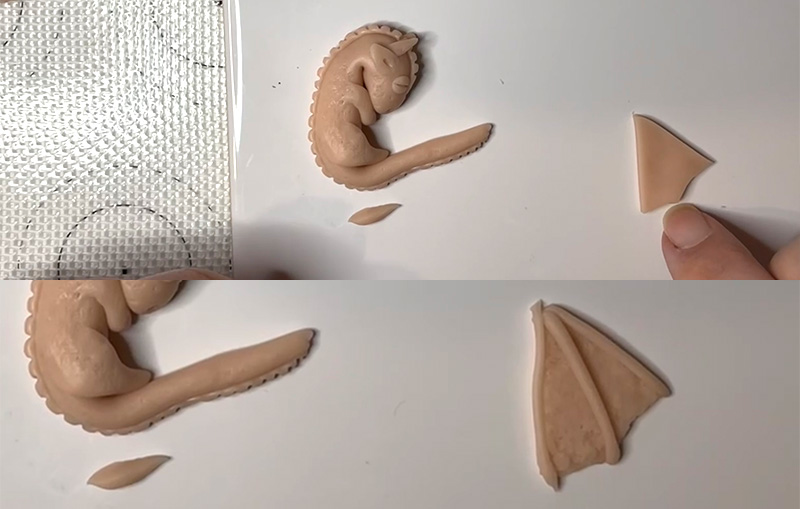
Lay the wing on the dragon and press down the top point to the back of the dragon.
Colouring the dragon
If you want to use powder to colour your dragon you should do it before it goes in the oven.
If you want your powdered colours to show clearly and pop then black clay is better.
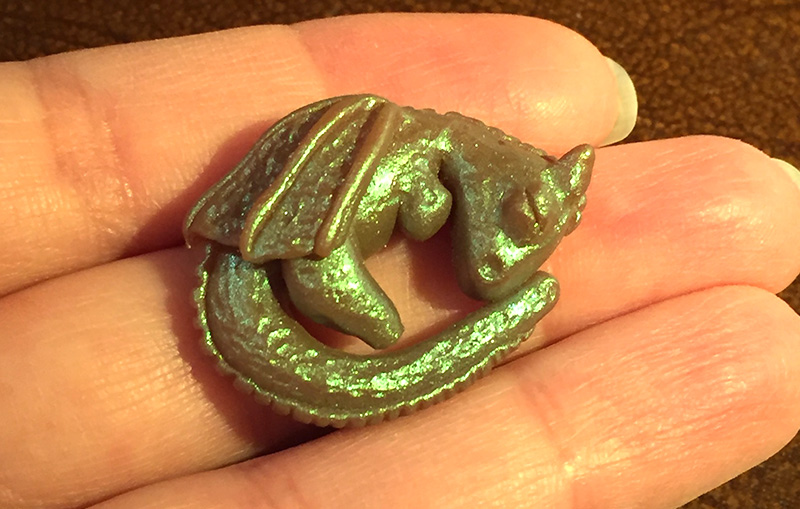
Baking your polymer clay dragon
Place the polymer clay dragon into the oven at 130°C / 265°F for 45mins.
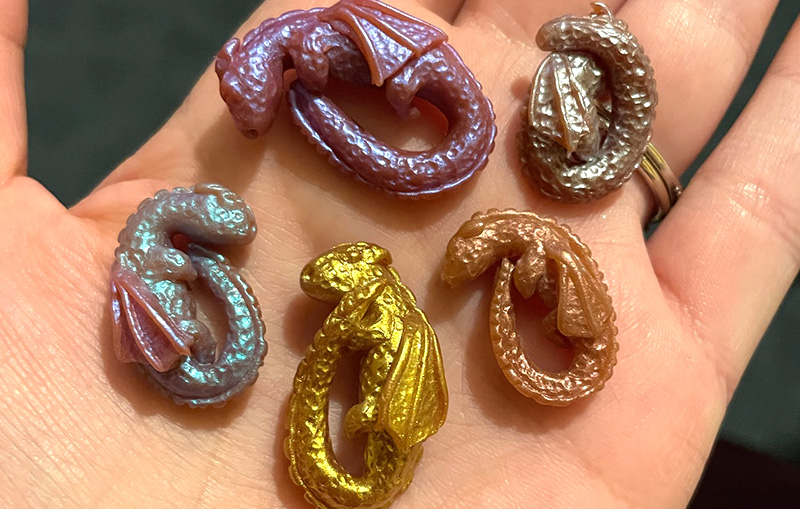
Looking for more polymer clay dragon craft ideas? Now you’ve made the dragon, how about making the egg?
Try these polymer clay dragon eggs which I’ve made into pendants and lockets for some fun dragon themed gift ideas.


