
Want to learn how to make these decorative resin letters for the perfect gift or decoration? These resin letters are so cool and are easy to make yourself! Impress your friends and family with personalised, colourful letter decorations.
I purchased these moulds specifically to make personalised decorations. I absolutely love the detail and pattern. The moment I saw them I knew I had to have them and they don’t disappoint. These are definitely some of my favourite moulds.
For the perfect sparkly effect, I decided to use resin in these moulds, so when the light catches you should be able to see them twinkle.
What You’ll Need For These Resin Letters
For this resin craft tutorial you are going to need just a few things to work with.
- Mask (resin is toxic)
- Goggles/glasses (you don’t want anything getting in your eyes)
- Glove/s
- Bottles of resin (part A and part B)
- Mixing cups
- Lolly pop stick (to mix the resin)
- Silicone moulds
- Powders
- A brush
- Sticking tape (optional unless you’re doing the reverse effect, see details below)
- Glitter
- Alcohol ink
Please remember when using resin to wear gloves, goggles/glasses and a mask. Do it in a well ventilated area and far away from children and pets. I have together a list of the tools you’ll need when working with resin.
Which Resin to use?
I specifically used Alumilite’s Clear Casting Resin for this tutorial. This resin cures so much quicker than other resins I’ve tried. It is nice and thick and cures nice and hard.
![]()
![]()
Get Alumilite Clear Cast Resin Now On Amazon
Which Silicone Mould to use?
Next, you will need this highly decorative silicone mould.
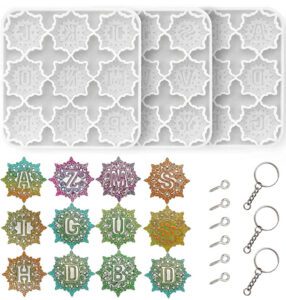
Get All 26 Letters From Amazon
Step 1 – Apply the Powder to the Resin Letters Mould
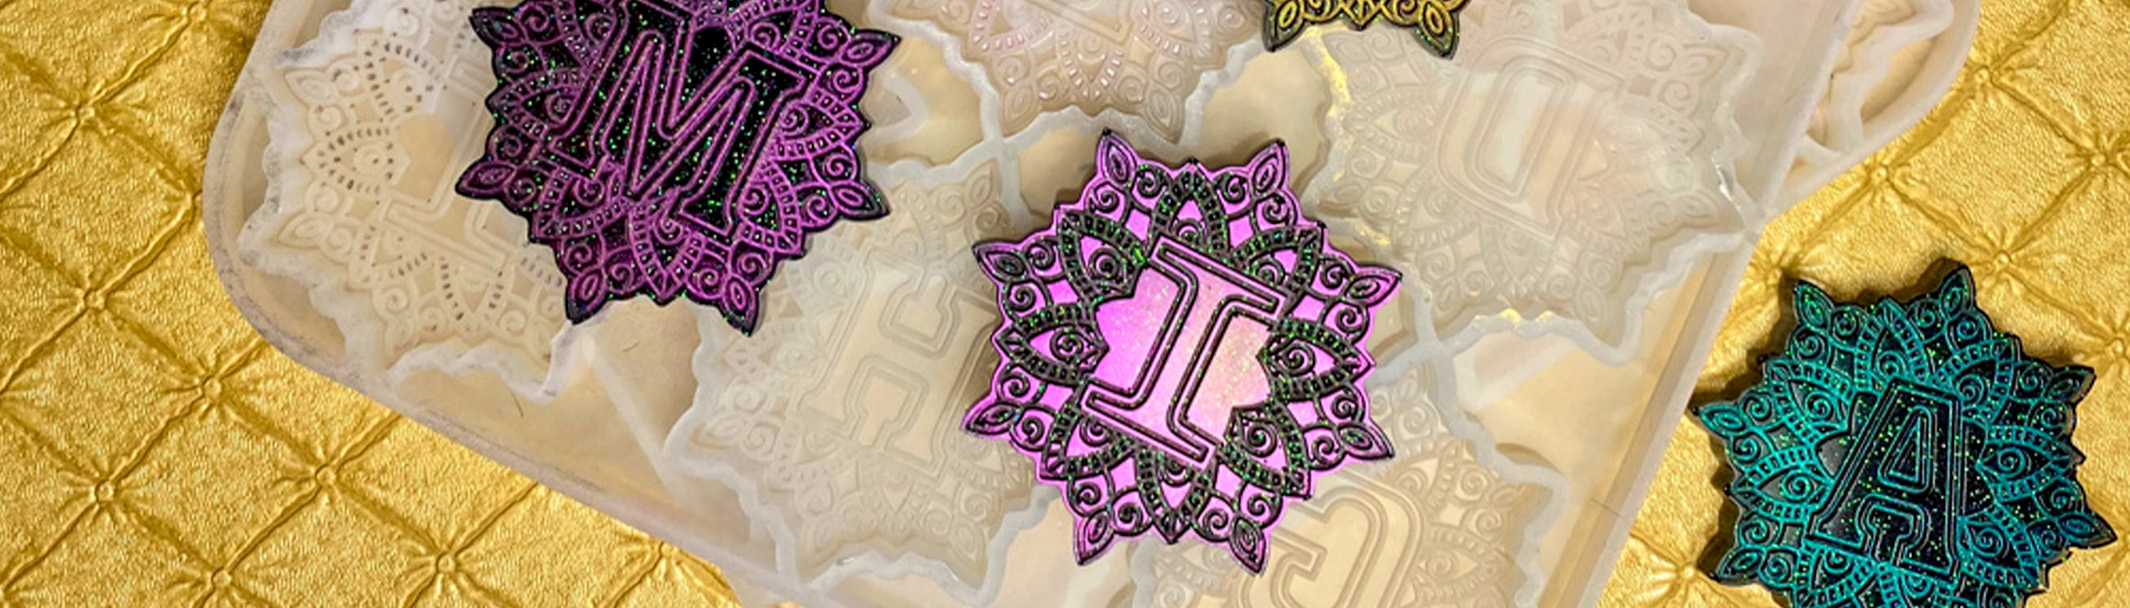
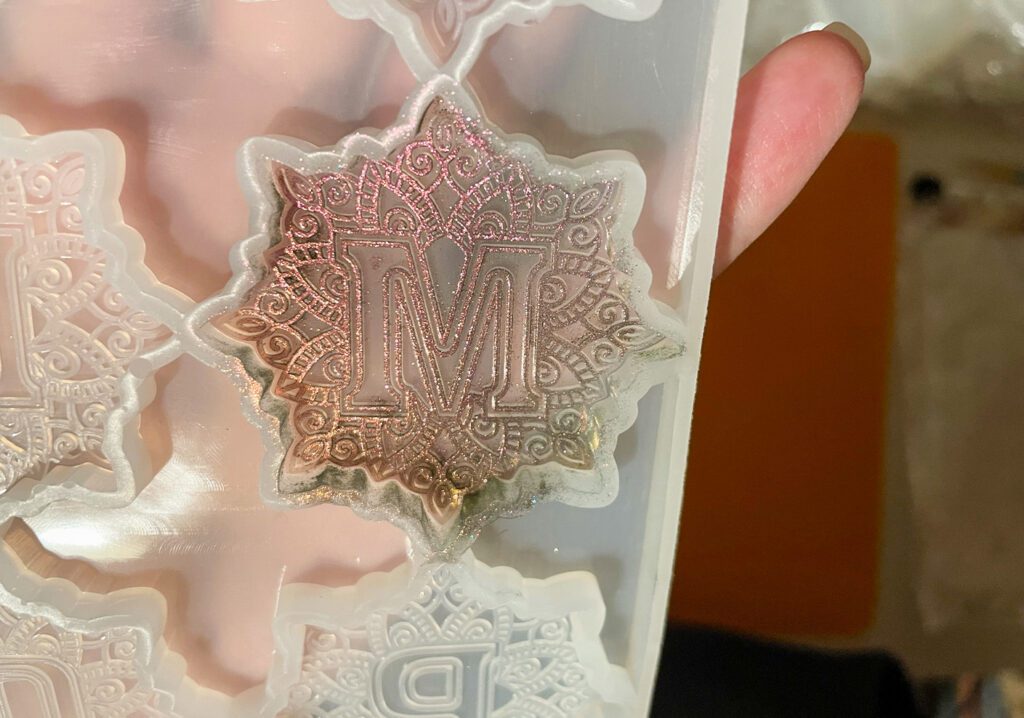
I use mica powders that have a nice metallic sheen to them. First I use my finger to rub powder onto the raised detail in the mould. (Letter ‘M’)
However you can also do the reverse effect, (Letter ‘I’) I use a brush to completely cover the face of the mould making sure to get into all the gaps (the gaps will be the raised areas on your finished piece), then use sticky tape to remove the excess powder on the raised part of the mould (this will be the indent part of your finished piece).
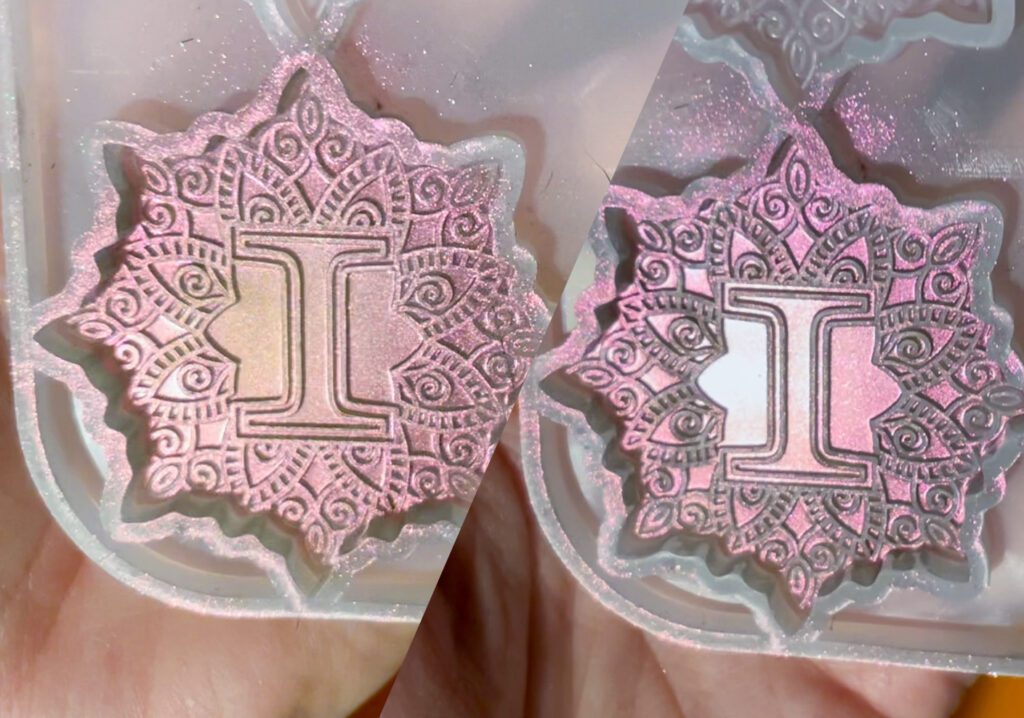
I’ve used a mixture of different coloured powders to see which works best and which shows the detail the best, although you can’t go wrong with silver if you can’t choose a colour, (unless your colour theme is gold, then just use gold). I used the same powder colour on both letters “M” and “I” to show the two different effects.
Step 2 – Mixing the Resin
Mix the resin 1:1 ratio. I used 40ml of resin altogether (20ml part A and 20ml part B) Mix it thoroughly, scraping all the sides and bottom of the cup. Try to do this part as carefully as possible in the hope of minimising bubbles, especially as we are using alcohol inks therefore will be unable to use a torch to pop them.

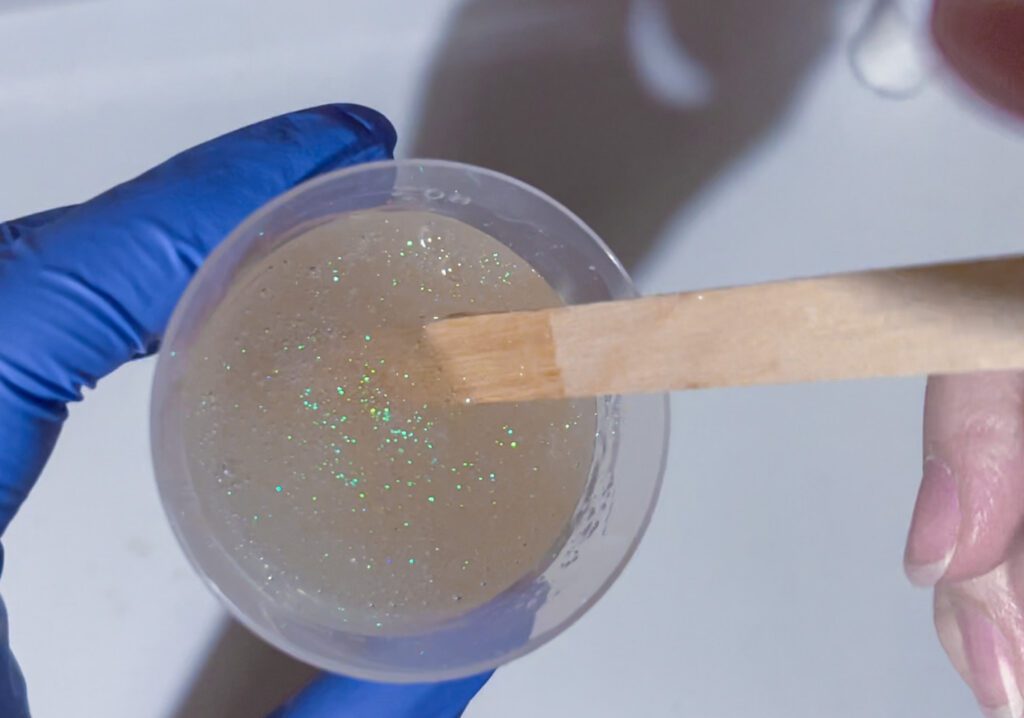
Step 3 – Adding Some Glitter to the Resin
Next we add the glitter. My favourite glitter to use is always iridescent white as it goes with any colour and looks great. I used fine glitter but be aware it will usually sink to the bottom. Glitter sinking to the bottom of the resin will mean extra sparkle on the front of the finished piece.
You can add more glitter if you want or wait a little while for your resin to thicken before pouring it into the mould. This should help the glitter evenly disperse throughout the resin. However It isn’t much of a concern as we are making the resin black.
Using white iridescent glitter with black resin really makes the colour of the glitter pop.
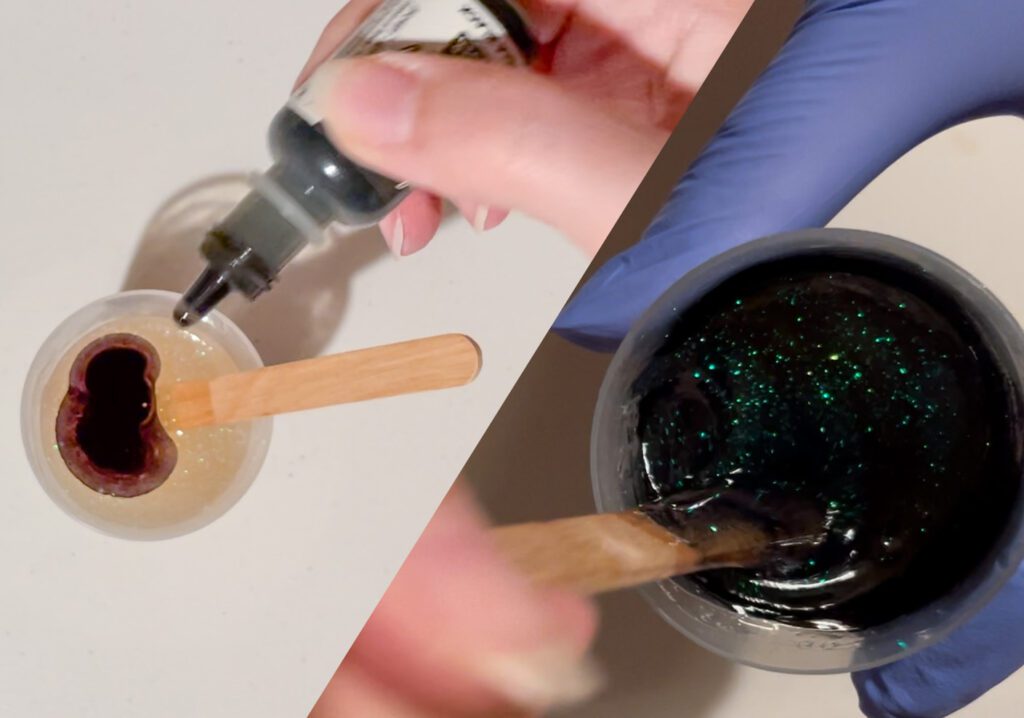
Step 4 – Colouring the Resin
Now add the ink. Alcohol inks are used to colour the resin. I used Jacquard pinata Mantilla Black alcohol ink. I did 3 drops to begin with. This is typically enough but I did add an extra 2 more drops (just for luck).
The resin will be dark enough to show the mica powders off and yet still be able to show some light through it.
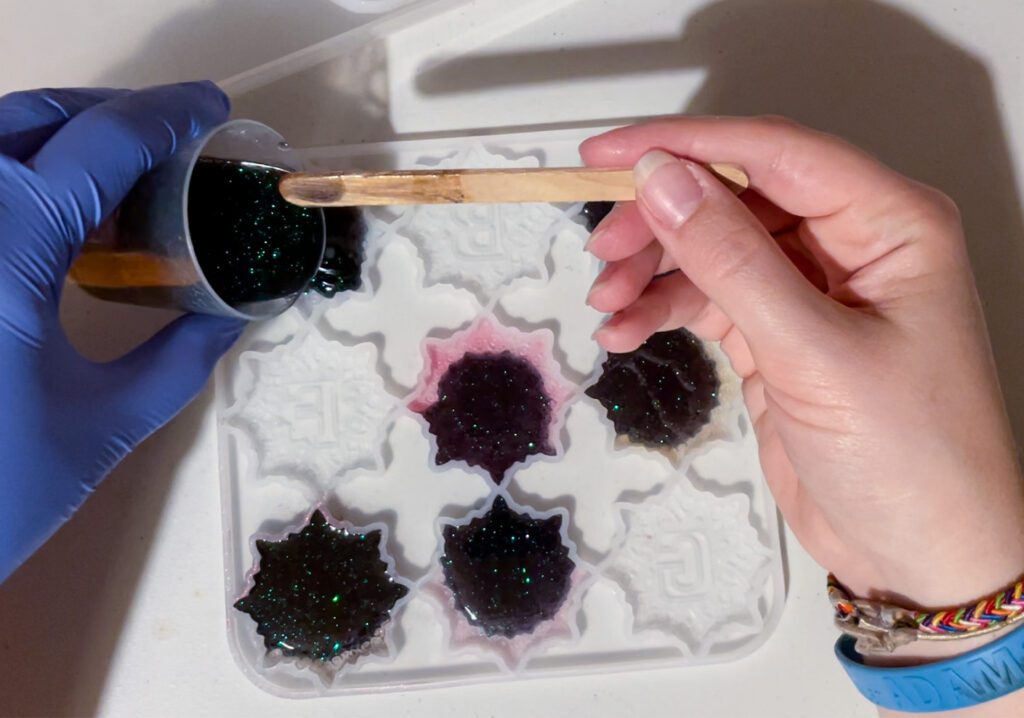
Step 5 – Pouring the Resin in the Resin Letters Mould
Use the lolly stick to help guide the resin into the mould and to the edges. 40ml of resin should fill at least 8 letters.
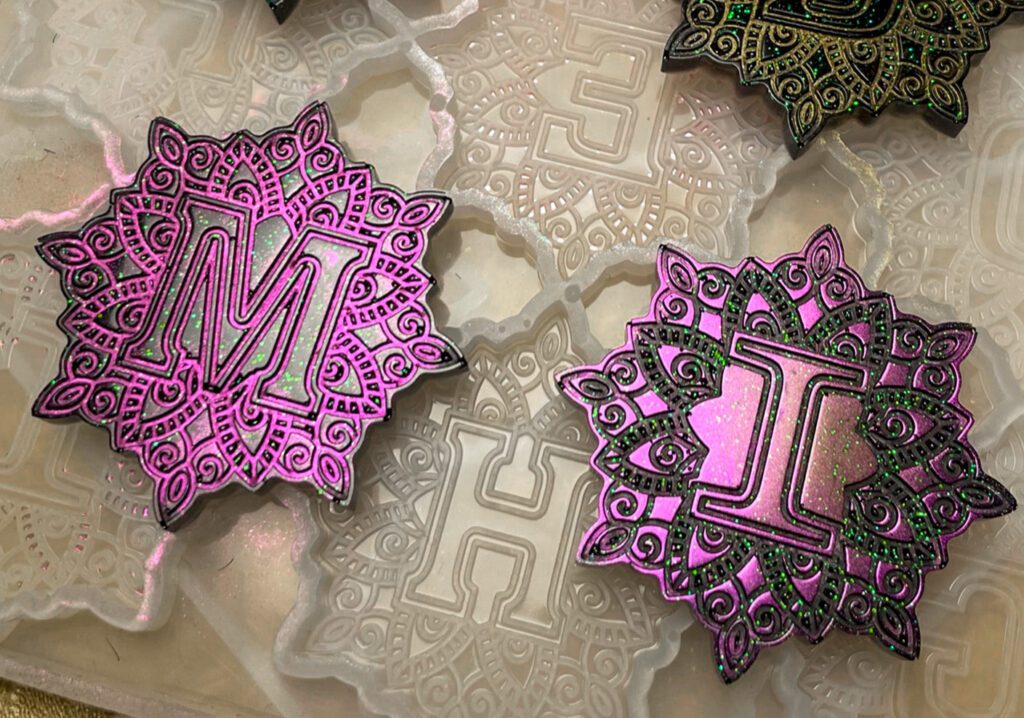
Step 6 – Results – Revealing your Resin Letters
Once you’ve filled the moulds it then becomes an anxious wait to see the final outcome. Leave the resin to set in the mould for around 12 hours or up to 24 if you’re patient.
Then it’s time for the big reveal.
I am over the moon with how these pieces turned out. The metallic powders look great and the dark resin makes the colours pop. The glitter shows through and the detail is amazing.
Let me know how your own decorative resin letters turn out!
Please share pictures if you try these at home! We have a great community on the Silicone Mould Addicts Facebook group.
I look forward to sharing a new resin mould with you soon.


