
Follow along to create your own delicious and unique personalised chocolate bar using a few simple silicone moulds.
Whether you are looking for a special gift, a fun treat or simply want to enjoy something unique and memorable, nothing beats handmade chocolates.
Read on to find out how to make some unique chocolate bars.
Getting Started
Heres what you will need to make your personalised chocolate bar:
- At least 100g of Chocolate
- Mixing bowls
- Spoons
- Microwave
- Food Colouring (Optional)
- Cocktail Sticks
Importantly you’ll need some silicone chocolate moulds. For this tutorial I am using two moulds:

Rose Silicone Mould
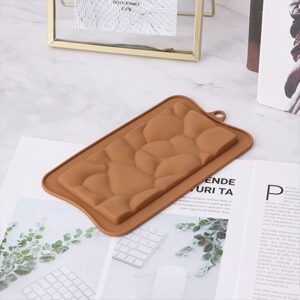
Mosaic Silicone Mould
Personalised Chocolate Bar Instructions
Pink Rose Personalised Chocolate Bar tutorial:
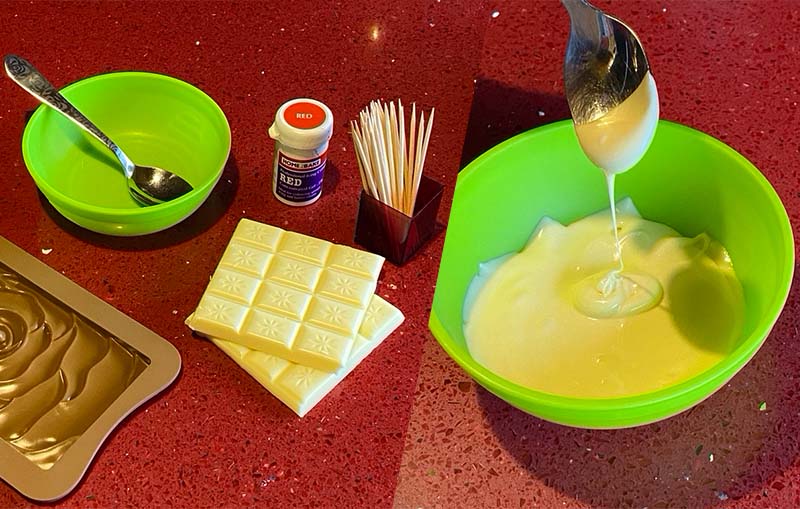
- To begin grab a 100g bar of white chocolate and melt 50g in a bowl. Running for 90 Seconds in a 1000W microwave will do the job.
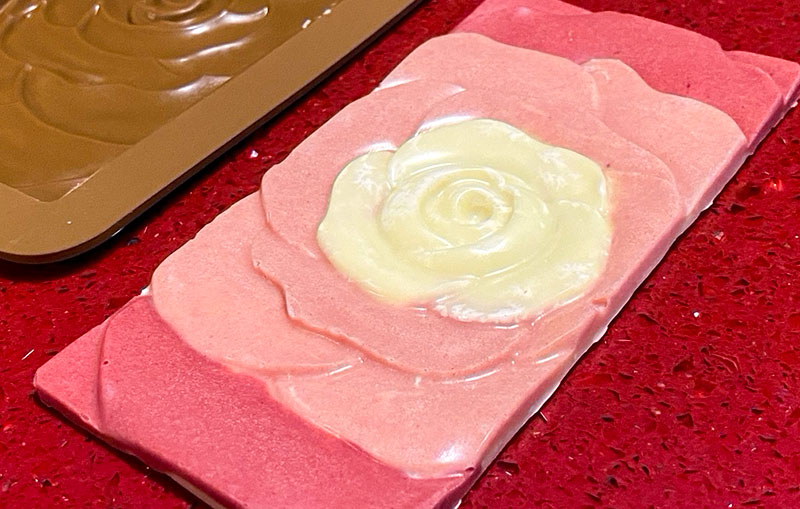
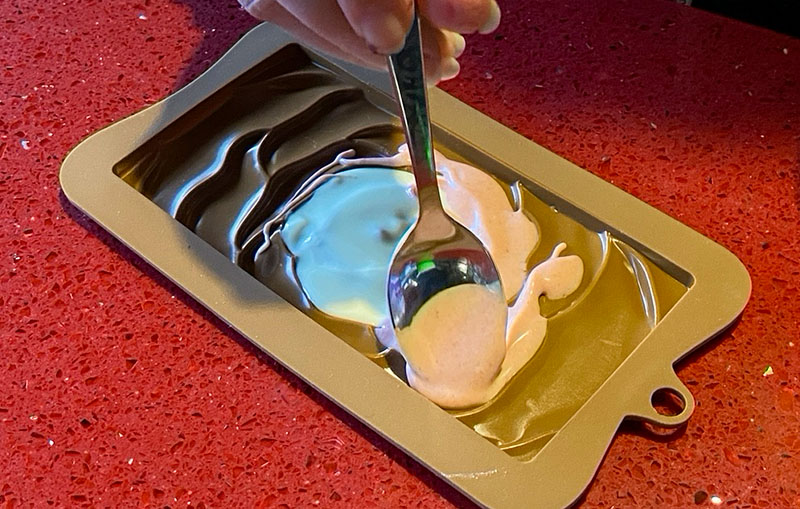
- Once the chocolate has melted begin adding some of the white chocolate to the centre of the mould, covering the inner petals of the rose.

Tip: For a precise finish let each colour of chocolate set before adding the next colour to the mould
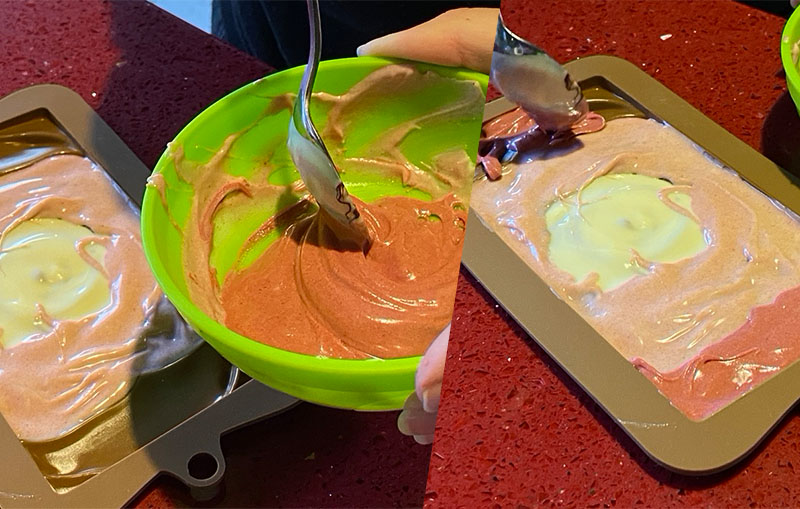
- Next add a few drops of red food colouring to the remaining chocolate in the bowl to create a light pink. Apply the light pink chocolate to the outer petals of the rose.
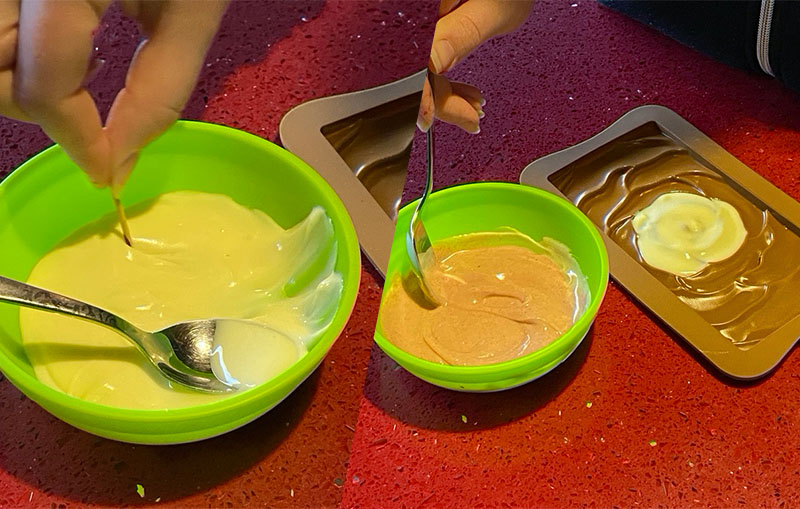
- Now to finish off the rest of the bar. Add some more red food colouring to the last of the chocolate until you get a much darker pink. Add this to fill the edges of the mould.
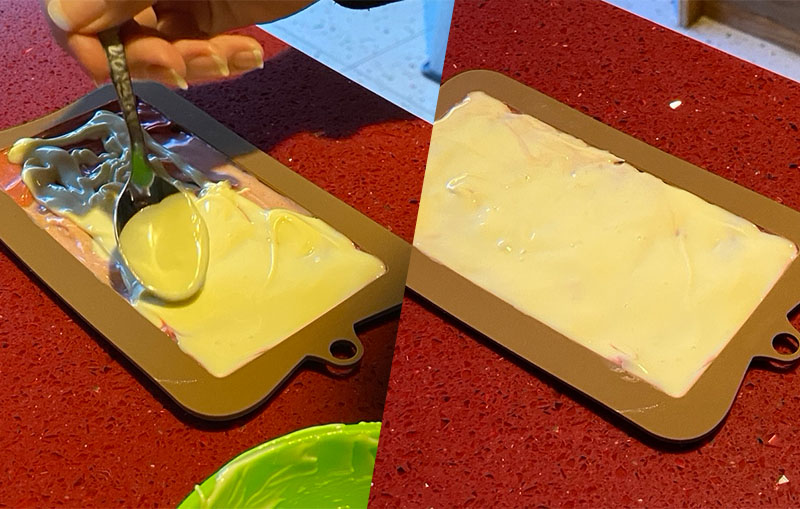
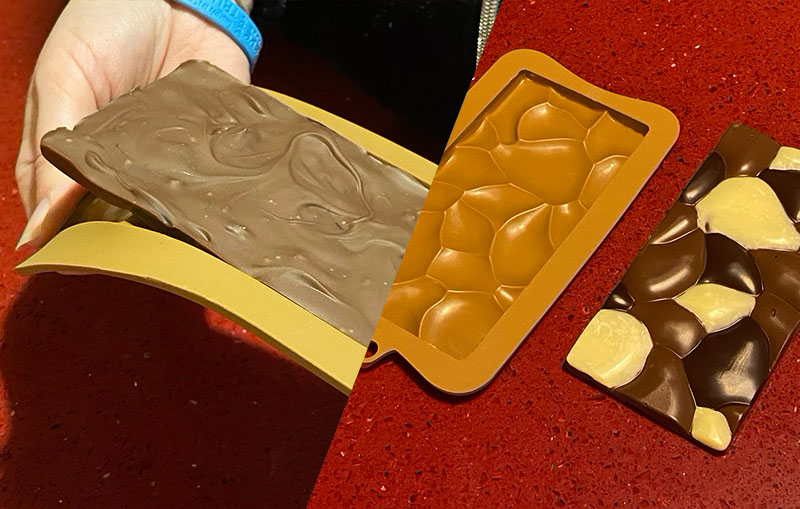
- Finally, melt the other 50g of white chocolate to cover the back of the chocolate bar. Once you have filled the mould, place in a cool environment to set. (usually between 1-2 hours). I don’t recommend placing in a fridge to set as this can cause some chocolate to discolour.
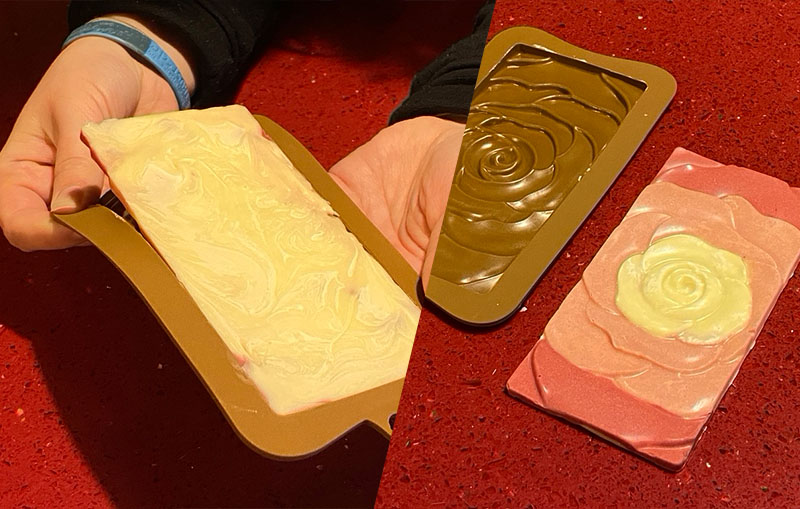
- When the bar is completely set its time to demould and reveal the final piece. Eat it, share it, or give it to somebody as a gift.
Mosaic Personalised Chocolate Bar tutorial:
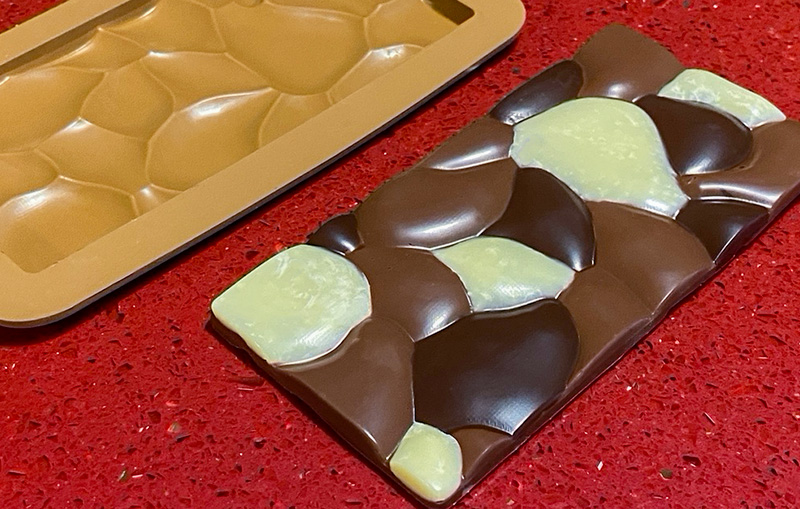
- You’ll need 25g of white chocolate, 50g of milk chocolate and 25g of dark chocolate. Melt the chocolate in separate bowls. Again, Running for 90 Seconds in a 1000W microwave will do the job.
- Once the chocolate has melted begin adding the white chocolate to your desired parts of the mould.

Tip: For a precise finish let each colour of chocolate set before adding the next colour to the mould
- Next add the dark chocolate to your desired parts of the mould, leaving spaces for the milk chocolate.
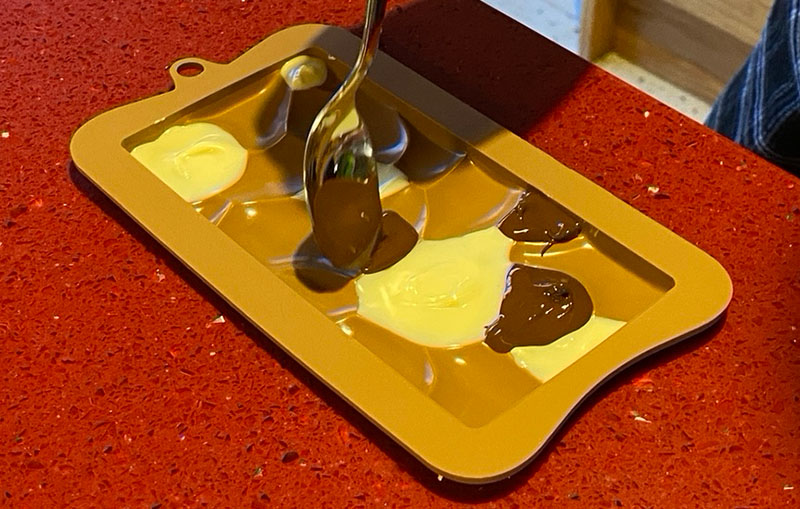
- Now to finish off the rest of the bar, use the milk chocolate to fill in the last of the spaces and to cover the back of the bar

- Once the mould is filled, place in a cool environment until the chocolate is set. (usually between 1-2 hours). I don’t recommend placing in a fridge to set and this can cause some chocolate to discolour.
- When the bar is completely set demould and reveal the final piece.
Making personalised chocolate bars is easy and fun. With a few simple ingredients, silicone moulds, and a little creativity, you can create something unique and special for yourself or someone else to enjoy. So why not give it a try today.


