
In this tutorial, I’ll guide you through the process of creating a 3D Resin Christmas Tree Decoration. This project is perfect for adding a personal touch to your festive decor or for crafting unique Christmas gifts for loved ones.
We’ll explore how to mix resin with dyes and glitter to achieve stunning effects, and I’ll share some tips to ensure your decoration comes out beautifully.
Resin Tutorial Equipment List:
- Safety gear: Mask, glasses/goggles, and gloves
- Safety gear: Mask, glasses/goggles, and gloves
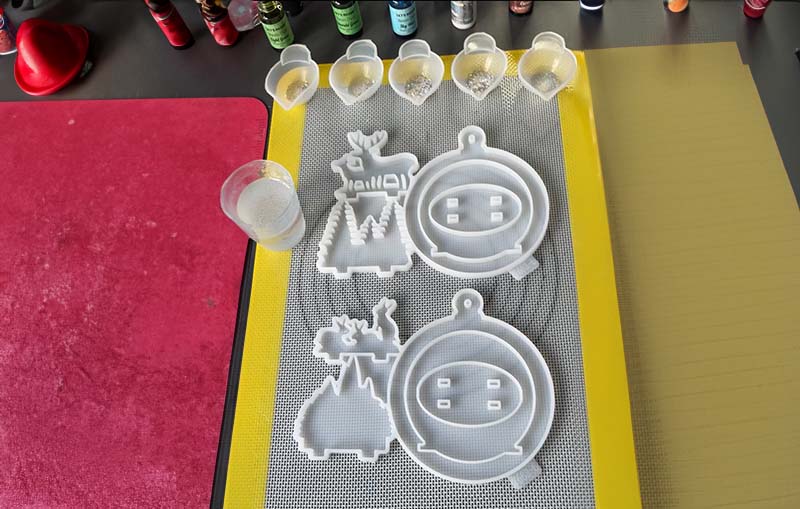
- Silicone moulds for your Christmas decoration
- Mixing pots (one for each colour and a larger one for the resin)
- Mixing sticks (I find lolly sticks work brilliantly)
- Resin dye in your chosen colours (I’ve chosen 5 colours for this project)
- Glitter in two sizes for added sparkle
- Resin and a bubble remover tool (optional but helpful)
- Rubbing alcohol and a spray bottle
- Cocktail sticks or similar fine tools for intricate work
Resin Christmas Tree Decoration – Step-by-Step Guide
Preparing the Moulds and Materials
- Organise Your Workspace: Ensure you have a clean, well-ventilated area to work in. Lay out all your equipment so everything is within easy reach.
- Safety First: Put on your mask, goggles, and gloves to protect yourself from resin fumes and spills.
- Prepare the Moulds: Lightly spray the inside of your moulds with rubbing alcohol. This helps to remove any dust and can aid in reducing bubbles in your resin.
Mixing and Colouring the Resin
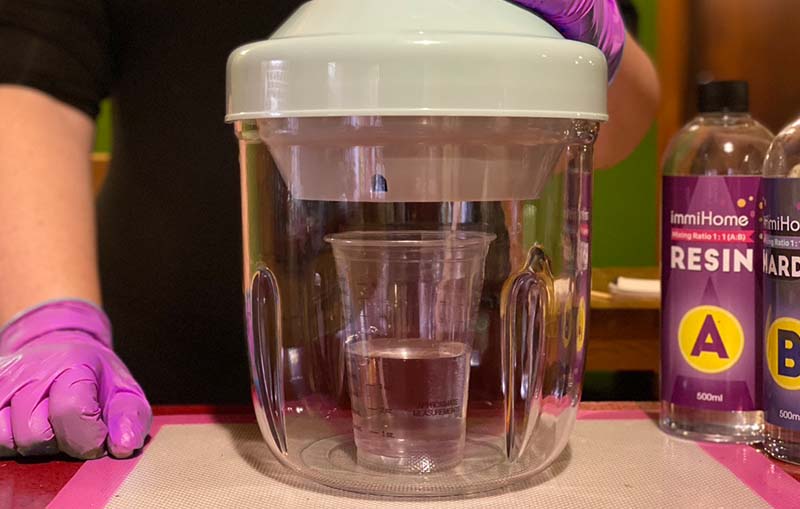
- Mix the Resin: Follow the instructions on your resin to mix it correctly in the large mixing pot. If you have a bubble remover, use it now to eliminate any air bubbles.
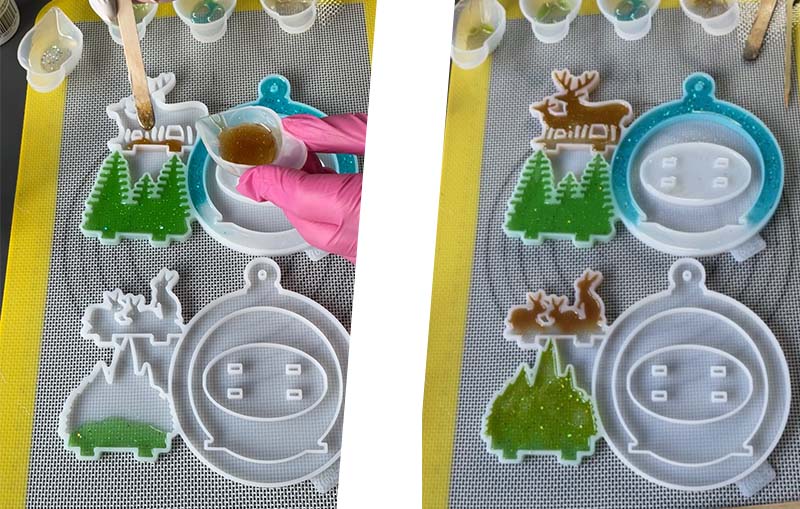
- Add Glitter and Dye: In separate pots, mix clear resin with glitter and your chosen dye. For my decoration, I used fine glitter with a caramel coloured resin dye for the rabbit and deer. I then used larger glitter for other elements. I chose two shades of green for the trees, blue for the sky, and white to represent snow.
- Blend Thoroughly: Mix each colour well, taking care to avoid introducing extra bubbles.
Pouring and Curing the Resin
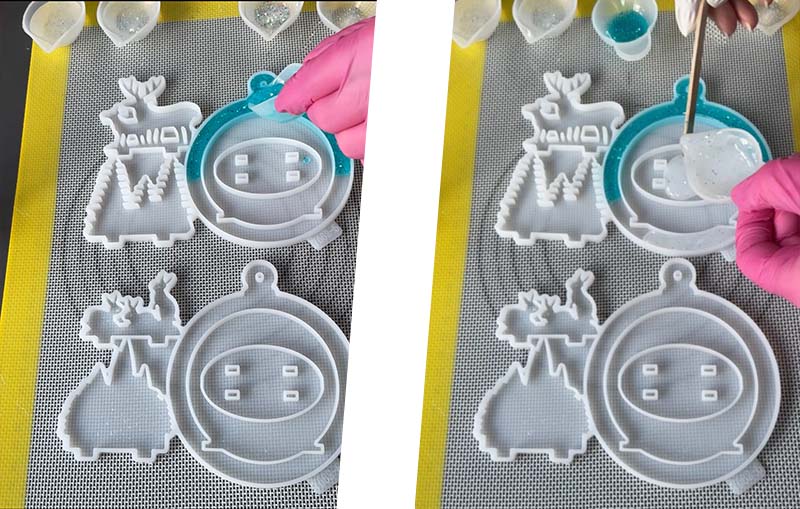
- Pour the Resin: Carefully pour the coloured resin into the moulds. Use your mixing stick to guide the resin into all areas, especially intricate parts like the reindeer’s antlers.
- Remove Bubbles: If you notice any bubbles, you can gently pop them with a cocktail stick or pass a heat gun briefly over the surface.
- Let it Cure: Leave the resin to cure as per the manufacturer’s instructions. This could take several hours to a day, depending on the resin type.
Finishing Touches
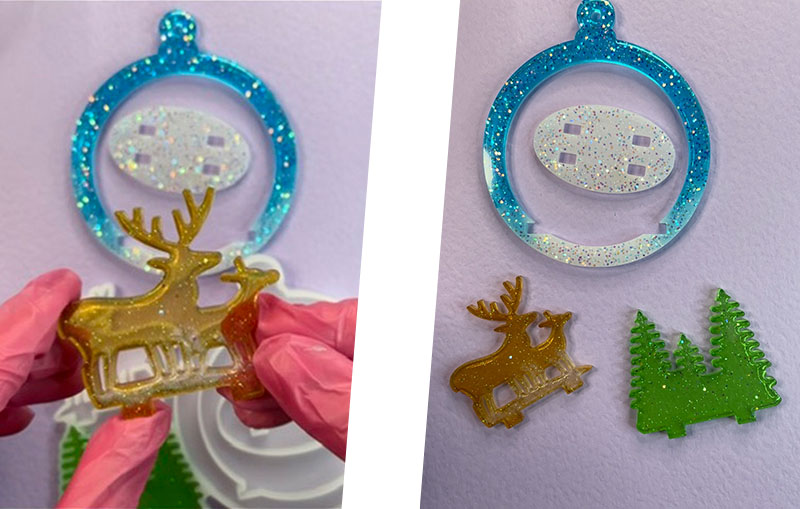
- Unmould Your Decoration: Once fully cured, gently remove your Christmas tree decoration from the mould. Be careful not to stretch or tear the mould.
- Inspect and Touch Up: Check for any rough edges or imperfections. You can sand these down gently if needed.
- Add Finishing Touches: You might want to add a ribbon or hook for hanging your decoration.
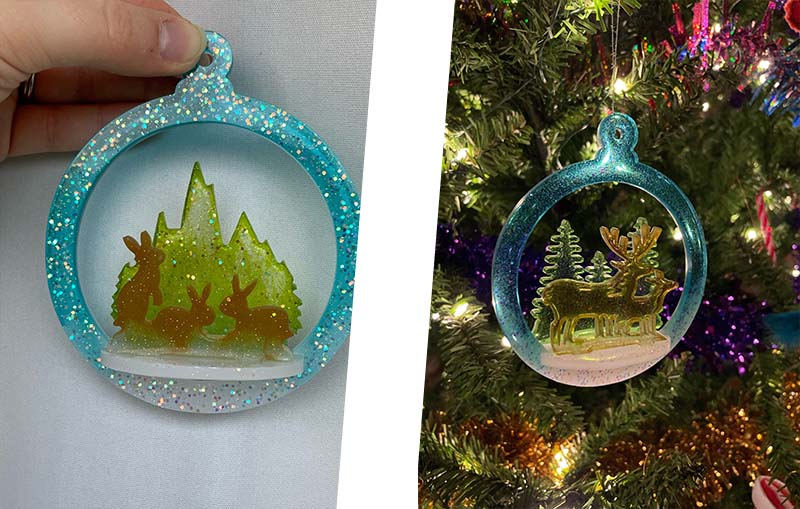
And there you have it, your very own handmade 3D Resin Christmas Tree Decoration!
Whether you’re adorning your tree or giving it as a gift, this unique piece is sure to bring joy and a touch of handmade charm to the festive season.
Happy crafting!


