
Looking for a fun gardening project? Make seed bombs and scatter these natural growing balls loaded with seeds across your yard or unused spaces to sow beauty spontaneously.
This agricultural art activity teaches seed saving and habitat restoration in a hands-on way. Roll up your sleeves and let your green thumb get creative with this seed bomb how-to guide!
Making wildflower seed bombs with paper is a fantastic family activity and a great way to promote sustainable gardening as well as biodiversity in your gardens.
Here’s how you can make them at home with this seed bomb recipe.
Getting Started – How to Make Seed Bombs with Paper
What you’ll need for making your seed bombs:
- Paper (Can be old newspaper)
- Seeds (e.g vegetable seeds or wildflower seed mix)
- Bowl/bucket
- Blender or food processor
- Strainer or some thin fabric
- Paper shredder (OPTIONAL)
- Mould/Cookie cutter (OPTIONAL)
No products found.
No products found.
How To Make Seed Bomb with Paper, Step-by-Step
Step 1
Choose your seeds. Pick native, non-invasive species ideally suited to your climate and growing conditions. Mix different flower colors and heights for visual appeal.
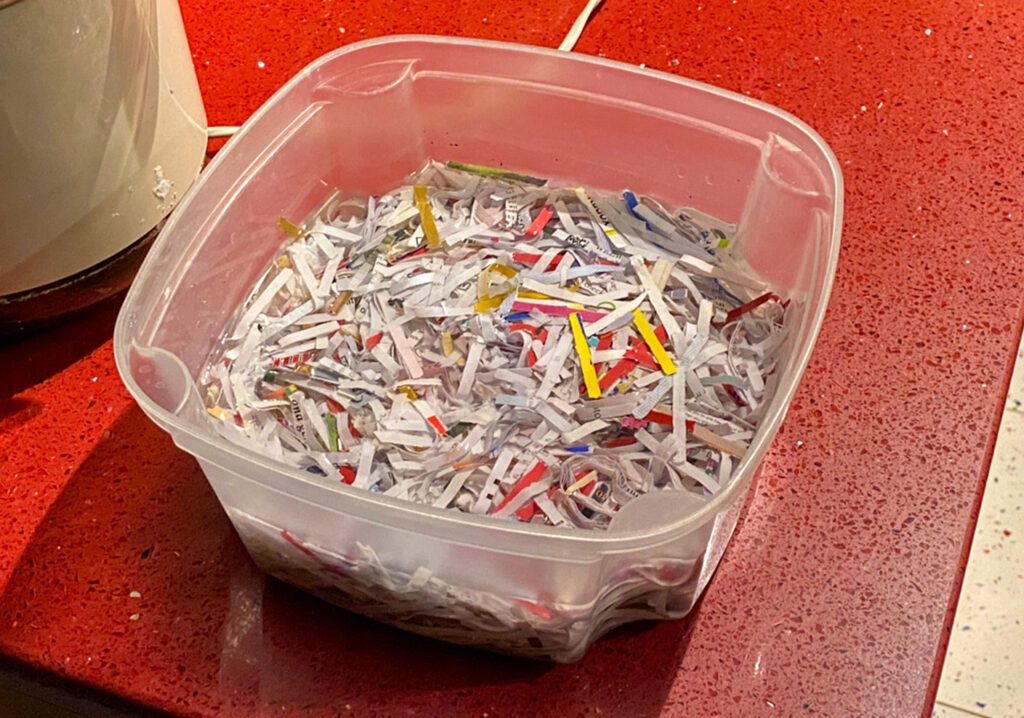
Get some old scrap paper and/or newspaper and rip the paper up into pieces. The smaller the better or use a shredder if you have one available.
Step 2
Put the ripped paper into a box or bowl and pour some water into it, enough to cover the paper to soak. Leave it as long as possible, at least overnight is best
Step 3
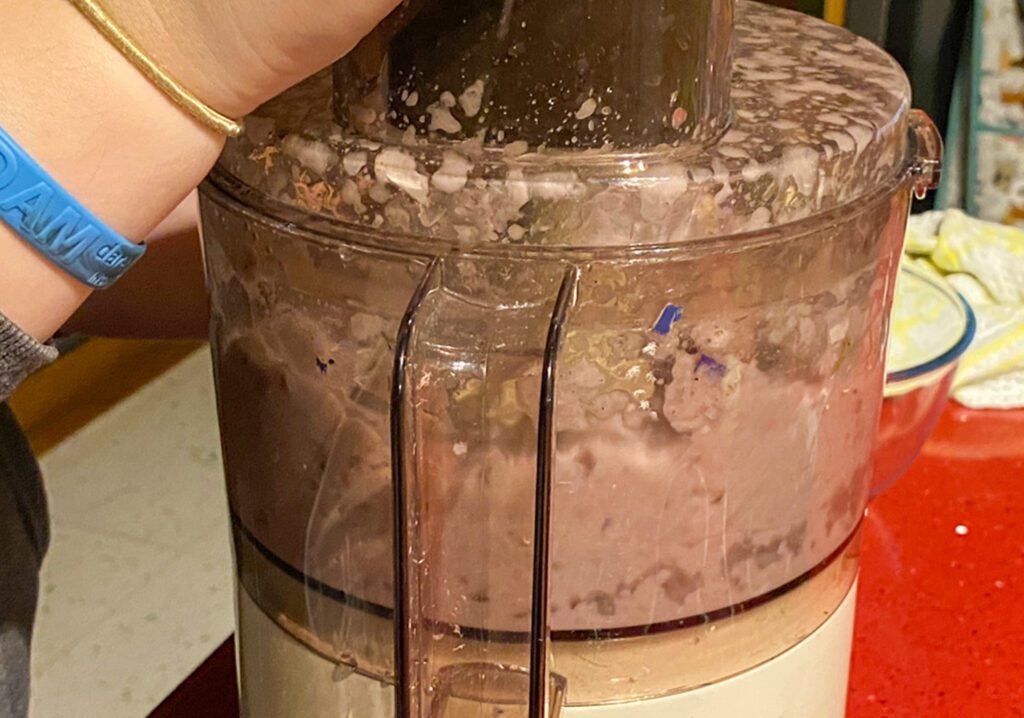
Time to blend your soaked paper! I recommend using an old blender if possible here. Put the paper into the blender and add some more water. Blend a bit at a time. Eventually you will end up with a mushy pulp.
Step 4
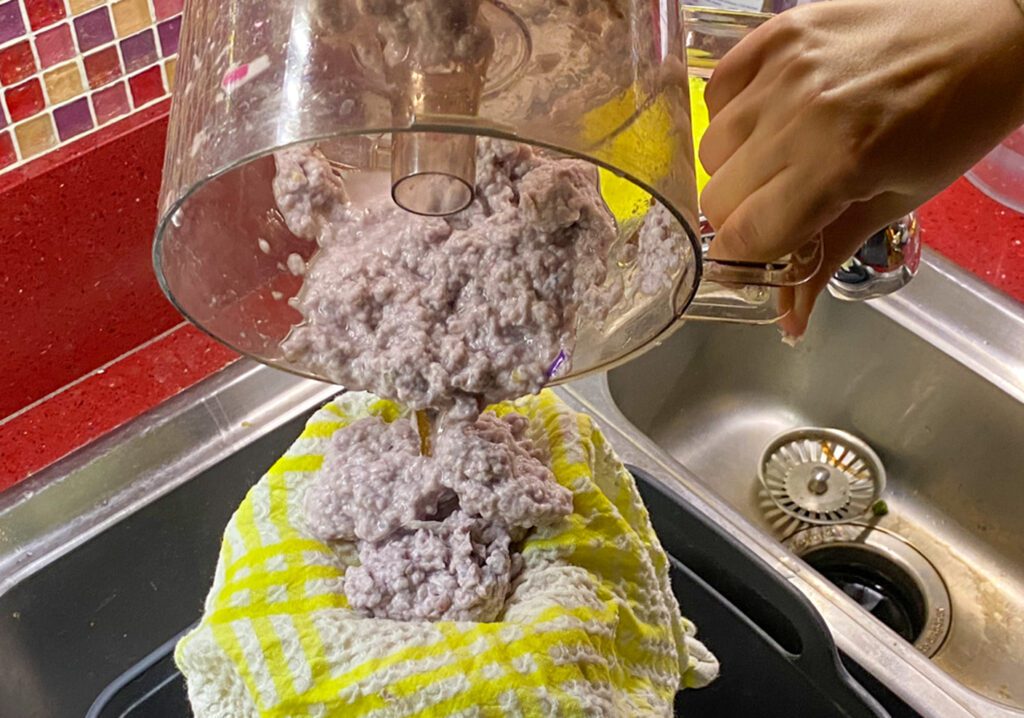
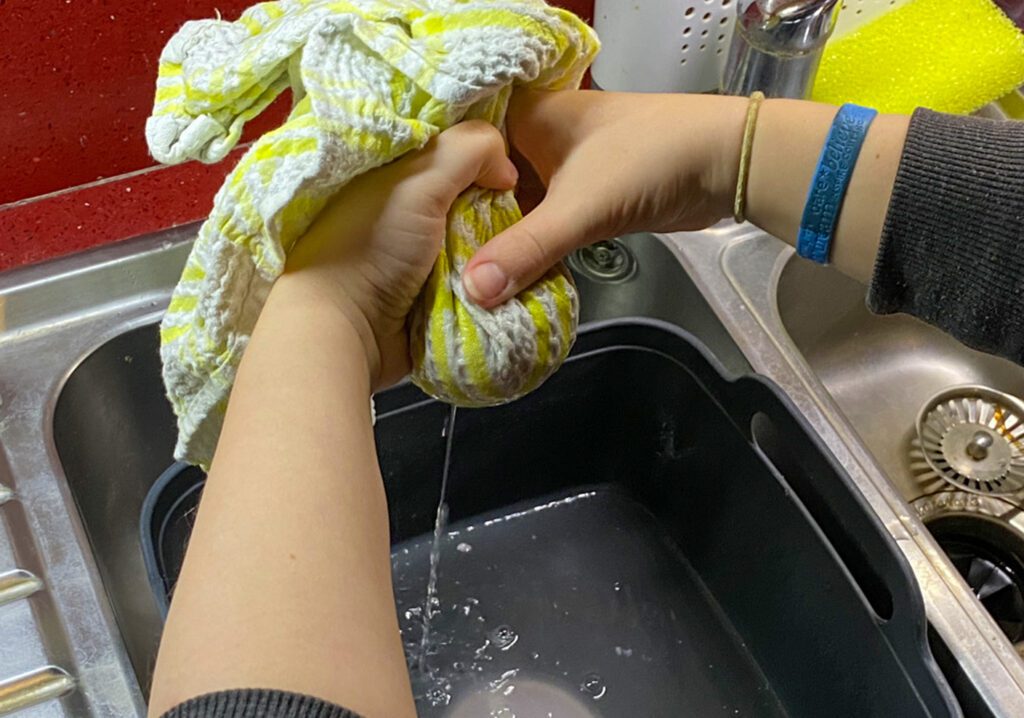
Place the pulp into a strainer or fabric (I use an old tea towel) and squeeze most of the water out but not too much as you still want it fairly wet and mushy.
Step 5
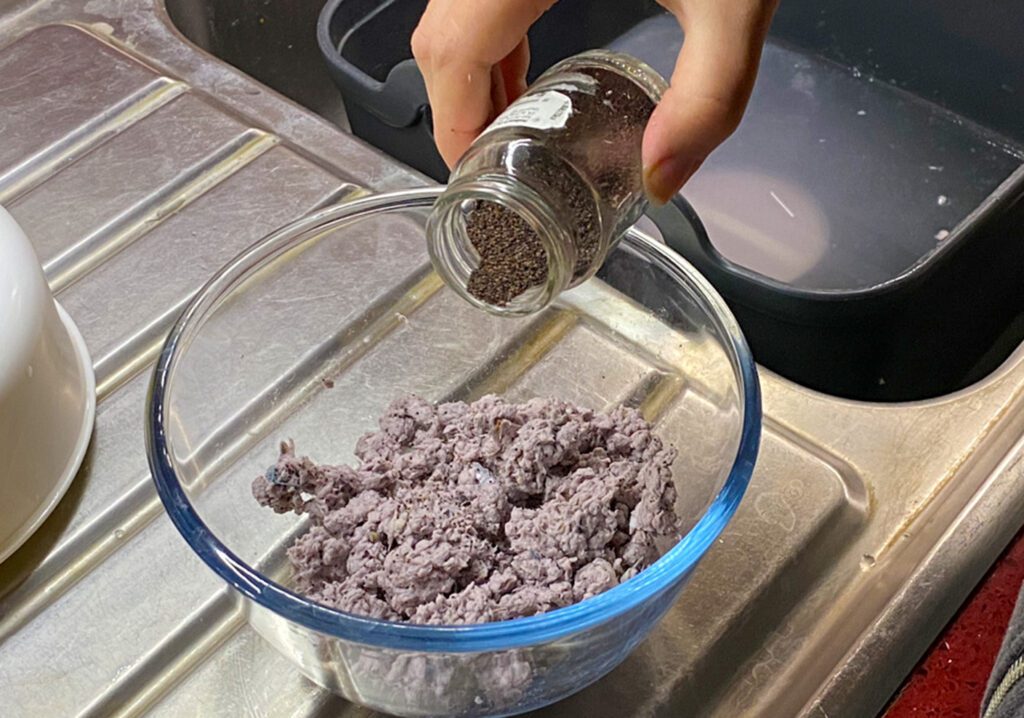
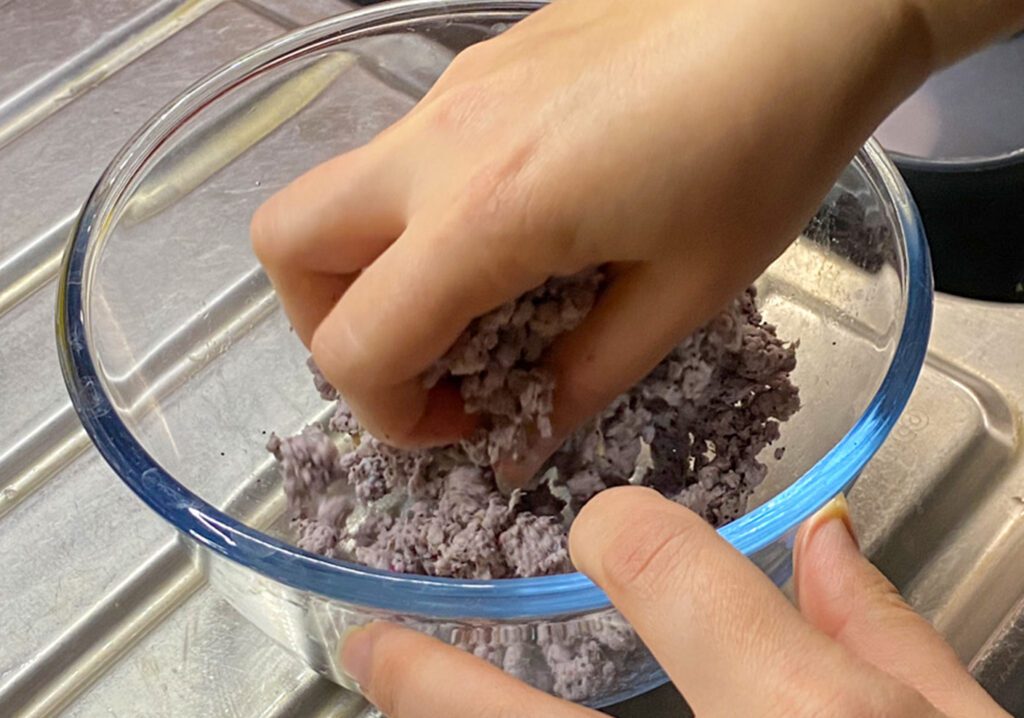
Transfer the pulp into a bowl then add your seeds and give it a good mix.
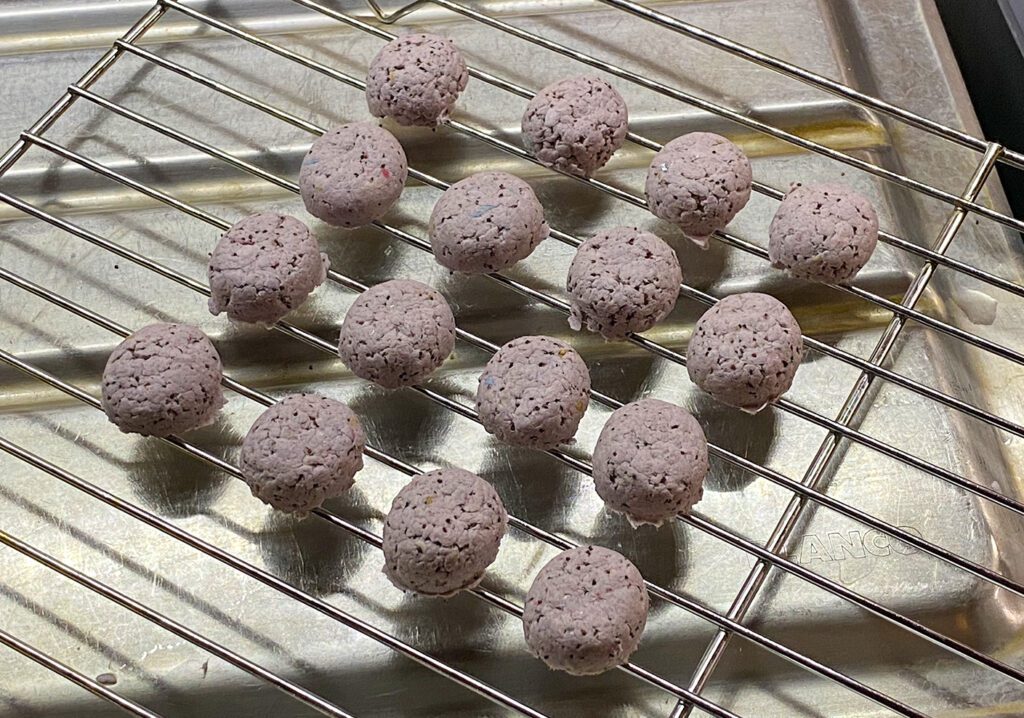
Step 6
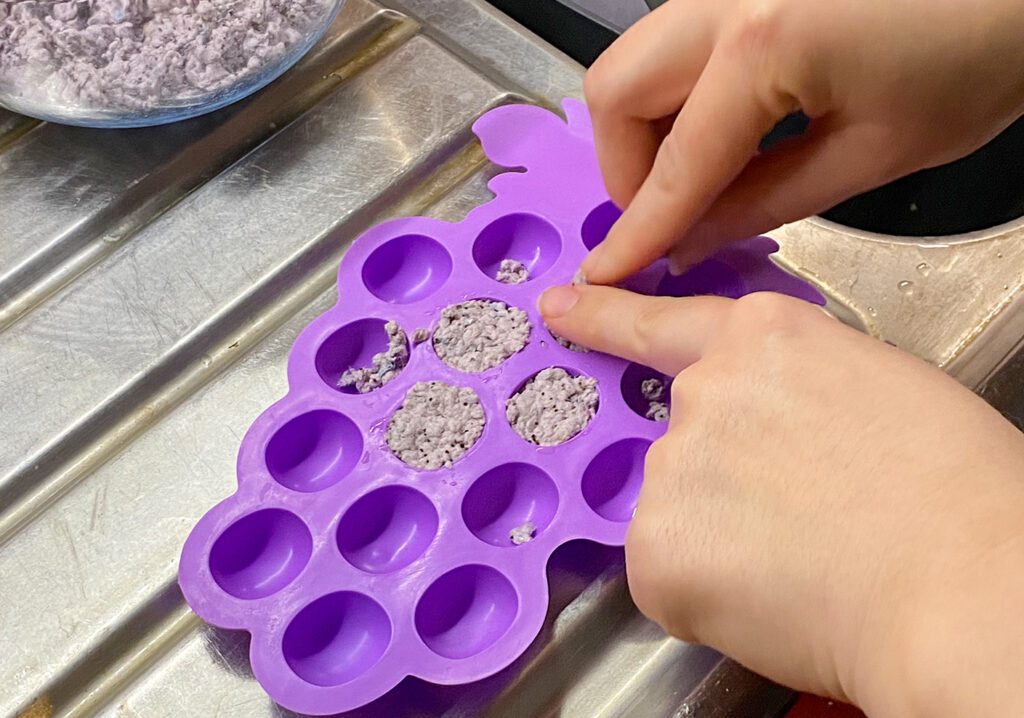
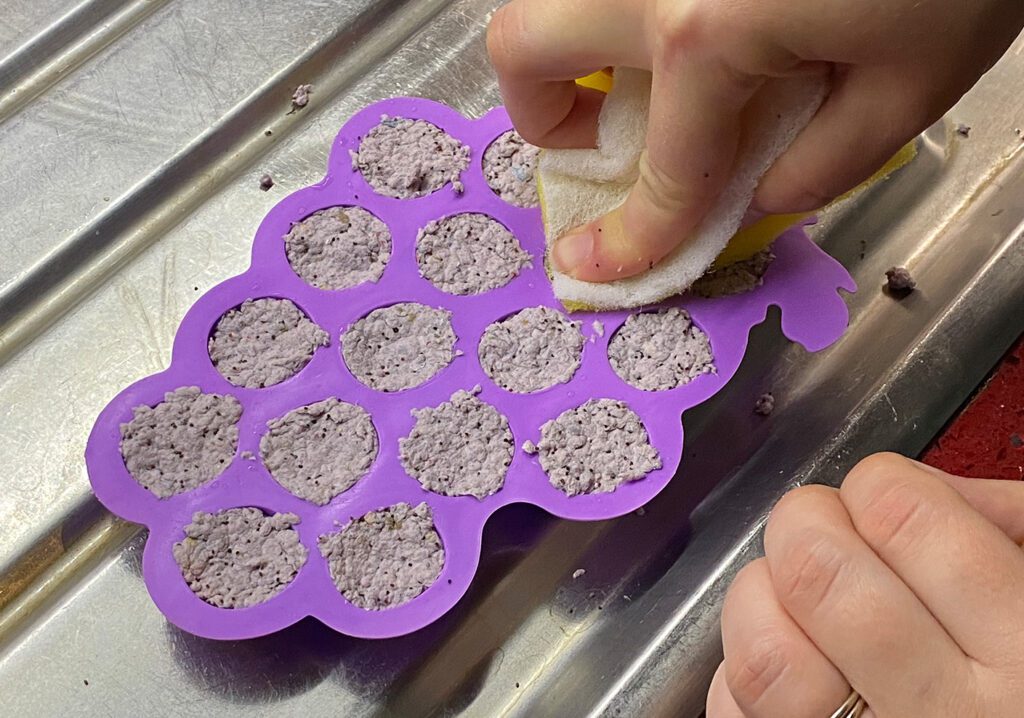
Take out some of the mixture and form a ball or pancake shape whilst squeezing the remaining water out. At this point you could put them into a mould or cookie cutter. A top tip is to use a sponge to help get any remaining moisture out.
Step 7
Finally, Pop them out and let them fully dry until they completely harden.
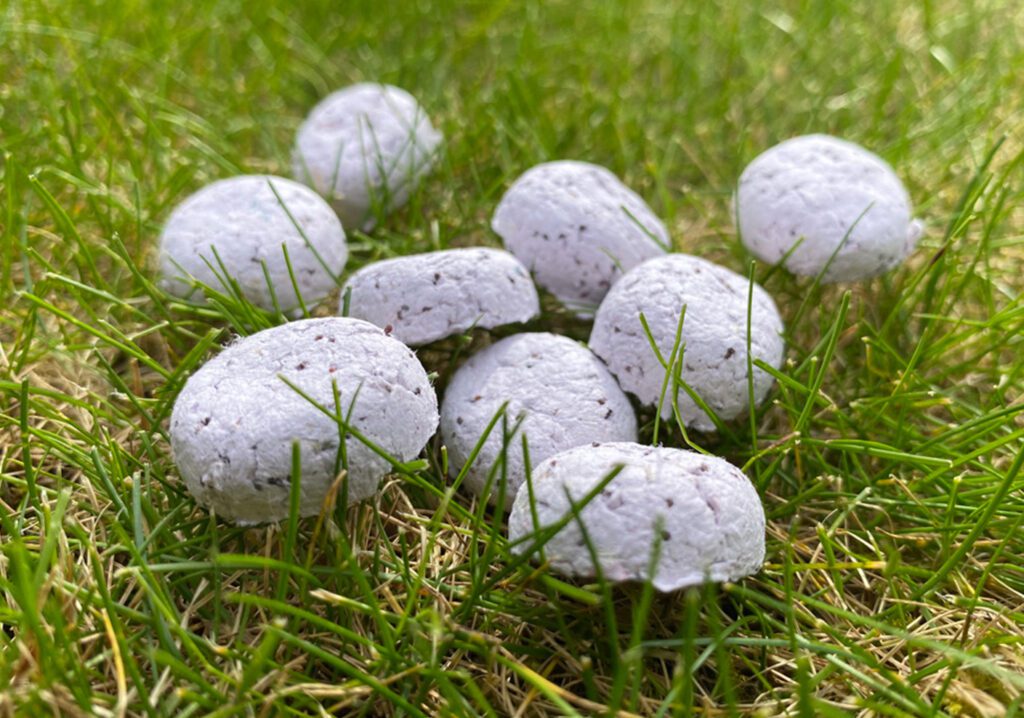
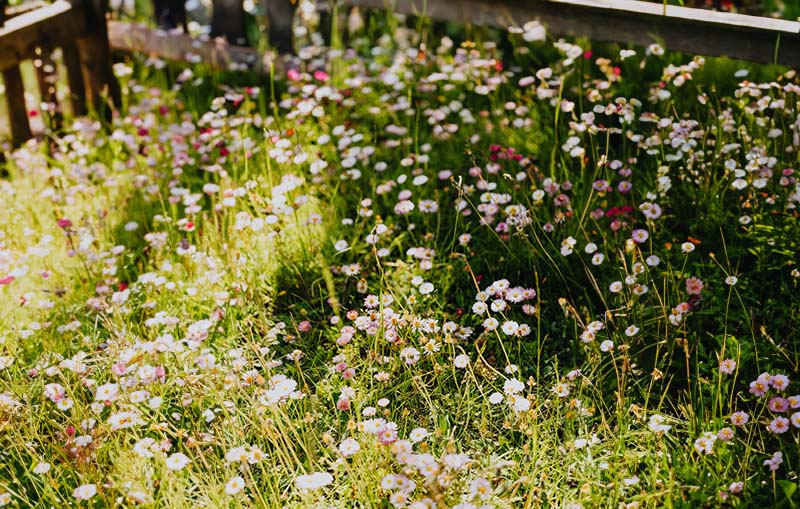
Using Your Seed Bombs
The fun doesn’t stop after making your seed bombs! Now comes the exciting part – sowing them to grow wildflowers, herbs and plants wherever you choose.
When Should You Plant Seed Bombs?
The best times to spread your seed bombs are during the early spring or fall when temperatures are mild and rainfall is moderate in your area.
Choose locations that receive ample sunlight and have exposed soil that is not too dense, rocky or overgrown
Good spots include meadows, banks of ditches and streams, vacant lots, roadside strips, trails, parks or your own backyard.
Seed Bomb Sowing Technique
When you find a promising seed bomb sowing site, scatter the balls over the area, spacing them out roughly 10cm apart depending on their size and density of vegetation.
Gently toss the balls underhand so they land softly without breaking apart. Or simply drop them if spreading near delicate sprouts.
Nature will take care of watering and feeding most seed bombs so maintenance is minimal. Check back on the locations periodically though to see if your bombs have sprouted and intervene if too much weed growth springs up.
If you want to plant them in soil then 2-3cm is best. Thank you for following along.
If you’re feeling even more creative, try these decorative resin letters.
Making Seed Bombs FAQ’s
How long do seed bombs take to germinate once planted or dispersed?
Seed bombs typically begin to germinate within a few weeks after planting, depending on the seed type and environmental conditions.
Can seed bombs be made with clay instead of paper, and if so, what would the process be?
Making seed bombs with clay involves combining natural clay, compost, and seeds into a dough-like consistency, then rolling the mixture into small balls. The clay helps protect the seeds from predators and harsh environmental conditions until they’re ready to sprout.
Once dried, these clay seed bombs can be scattered in desired areas, where they’ll break down with rain, allowing the seeds to germinate and grow. This method is particularly favoured for its durability and ease of distribution, especially in community or guerrilla gardening projects.
How should seed bombs be stored before use, and do they have an expiration date?
Storage conditions for seed bombs should be cool and dry, and while they don’t have a strict expiration date, it’s best to use them within a year for optimal germination rates. For more details, you might want to consult gardening resources that specifically address these aspects.


