
Looking for a creative and eye-catching project to make with polymer clay? Look no further than my super easy but very effective way of making scaly dragon eggs.
Not only are dragon eggs a fun and unique craft project, but they make wonderful decorative and colourful pieces. In this guide, I’ll show you how to craft dragon eggs with polymer clay step-by-step. Read on to learn more!
Getting Started
Heres what you will need for this polymer clay project:
- Any Polymer Clay (Black is best if using mica powders)
- Sharp Pointed Scissors
- Flat Surface to work on
- Access to an Oven (preferably one separate from your food oven)
Optional
- Mica powder
- acrylic paint
- brush
Dragon Eggs Instructions
Once you have all your equipment ready, it is time to start crafting dragon eggs with polymer clay.
The first thing you will need to do is choose the amount of clay you want to work with and then condition the clay.
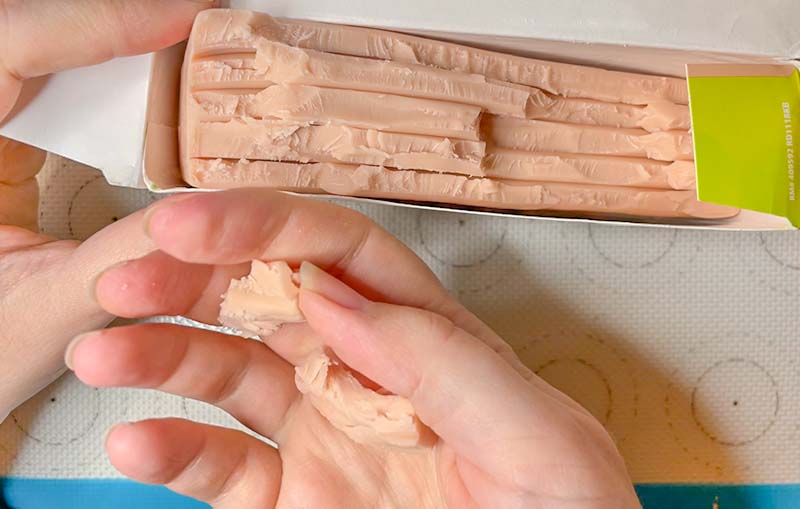
This can be done by kneading, rolling and working the clay until it is soft and pliable. Once the clay is conditioned, you can begin to shape your dragon egg. Start by making a basic egg shape, using your hands.
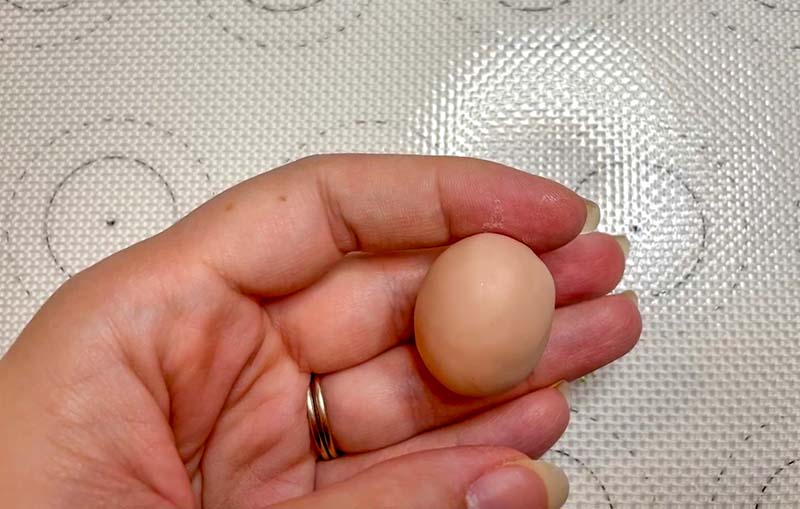
Optionally you can push it down onto a tile or flat surface so the egg will have one flat side. It’s best to do this before creating the scales.
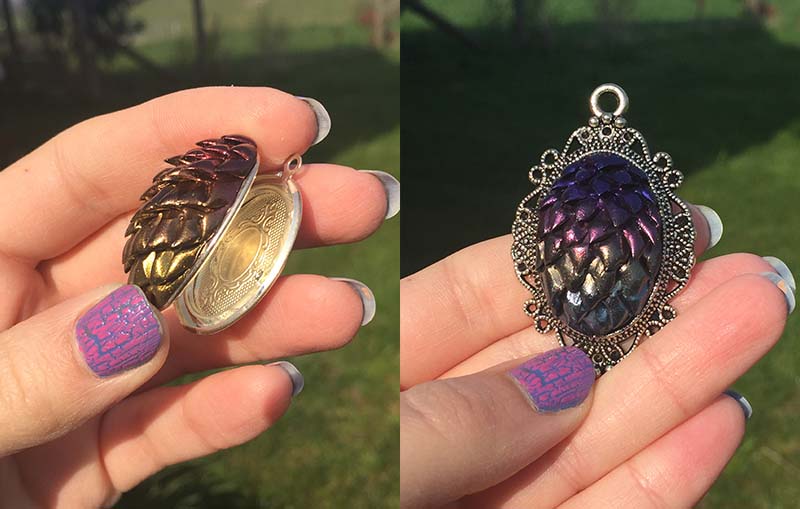
If you are planning on making it into a locket or putting it in a pendant frame (please see photo) do it now. Leave it on/in what ever you are using, including when it goes in the oven. Just remember once baked to pop them off/out and then glue them back into place.
Making the dragon egg scales
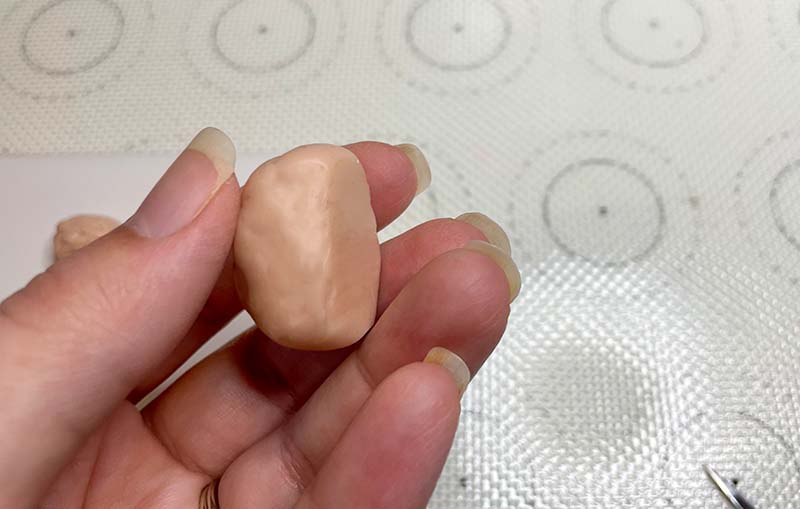
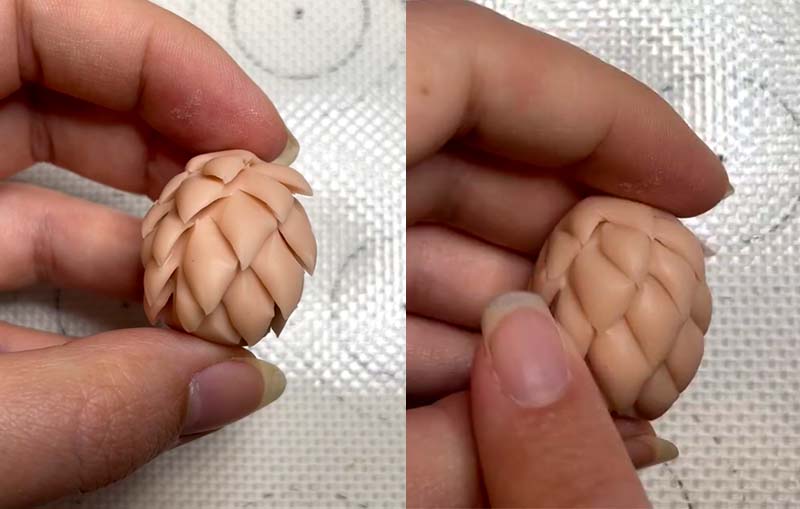
You could make each scale individually and add them by layering each one on top of the other if you wanted. However there is a way that will be much quicker and easier, yet still give the same detailed effect.
Using some thin, straight and sharp pointed scissors cut into the egg starting from the top. Cut V’s along the top in a row. Then for the next row put each scissor point to each V point on each scale either side and cut another V.
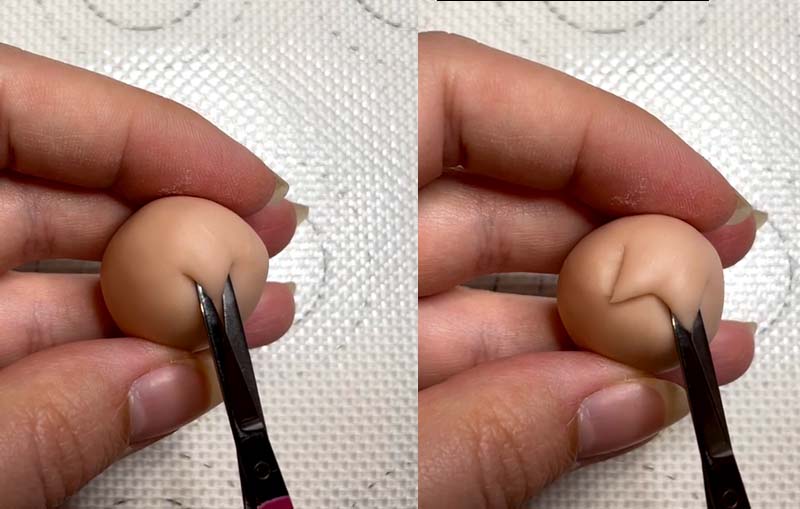
Do the whole row before going into the next row. Your scales will stick up a bit so I stroke it downwards to gently push the scales flatter. You can keep the scales pointy if you want but once baked they can be sharp.

Baking the egg
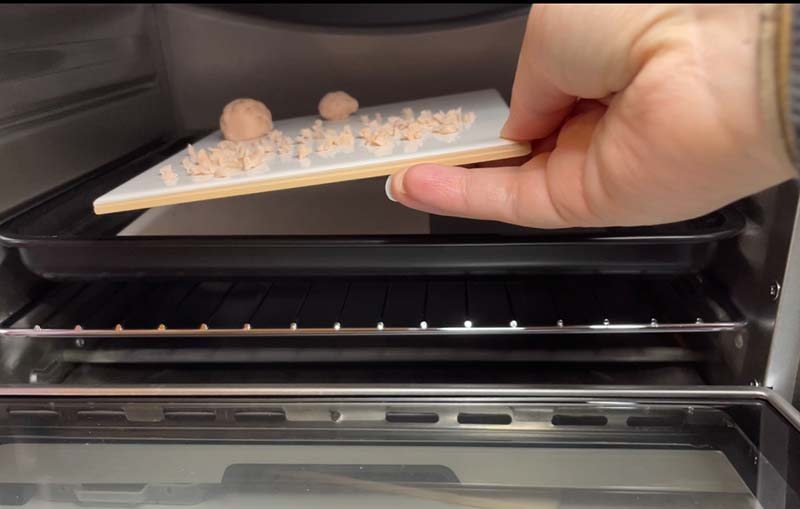
If you are colouring your egg with mica powder now is the time to do it. Once you are satisfied with your dragon egg’s shape, colour and texture, it is time to bake!
Preheat your oven according to the directions on your clay package. Then place your dragon eggs onto a baking sheet and bake for the suggested time.
With Fimo bake at 110°C (230°F) for 15 to 30 mins per 1 Quarter inch.
Colouring your Dragon Eggs
You can use any colour clay you want with no need to add to it afterwards. If you choose to use mica powder to colour your clay, use a soft brush BEFORE it goes into the oven.
Black clay works best with mica powders as it makes the colour show up really well. If you are using paint this can be done on any colour clay after its been baked.

Thank you if you have been following along. With these simple instructions, you can create beautifully shaped dragon egg jewellery. Enjoy!
If you’re feeling even more creative, try these dragon silicone moulds. These are great for baking and cake toppers.


