
Learn how to create your own custom silicone mold easily with this tutorial. Having a good negative mold is important for creating resin castings or jewellery with epoxy resin.
While you can purchase a variety of silicone mold designs, creating your own unique designs is easy with a custom mold. Follow these instructions to create a simple flat top custom silicone mold for resin.
Making a Custom Silicone Mold – Table of Contents
- Getting Started
- Choosing and cleaning the object
- Create a Mold Box
- Mix the Silicone Rubber
- Pour the Silicone Rubber
- Let it Cure
- Remove the Custom Silicone Mold
- Your Custom Silicone Mold
Getting Started
What you’ll need for making your custom silicone mold:
- An object to cast
- Silicone rubber
- Gloves
- Measuring cup or jug
- A stir stick (Lolly Stick)
- Plastic container or cookie cutter
- Wide sticky tape
- Mould release (OPTIONAL)
Here are the steps to make your own custom silicone mold:
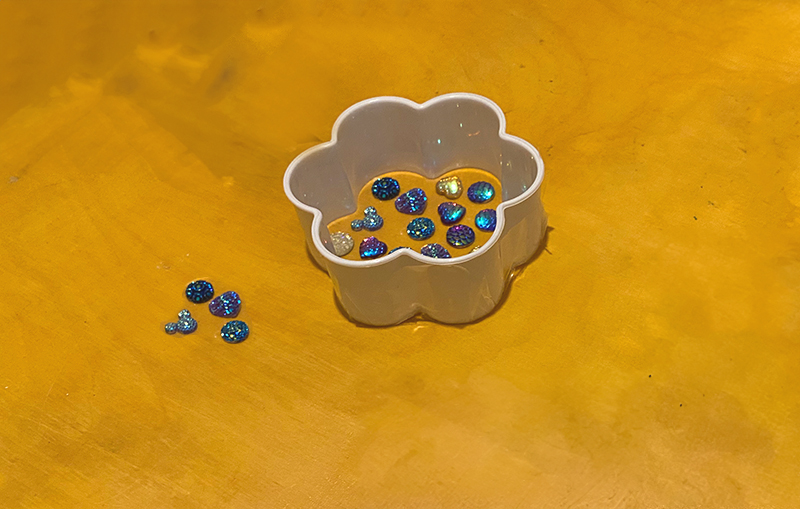
1 Choosing and cleaning the object
Choose an item you want to use to create your mold. For this tutorial, a selection of differently shaped objects with various textures and patterns is used.
Clean the object or objects that you want to mold thoroughly. Any dirt or debris left on the object can affect the mold’s quality.
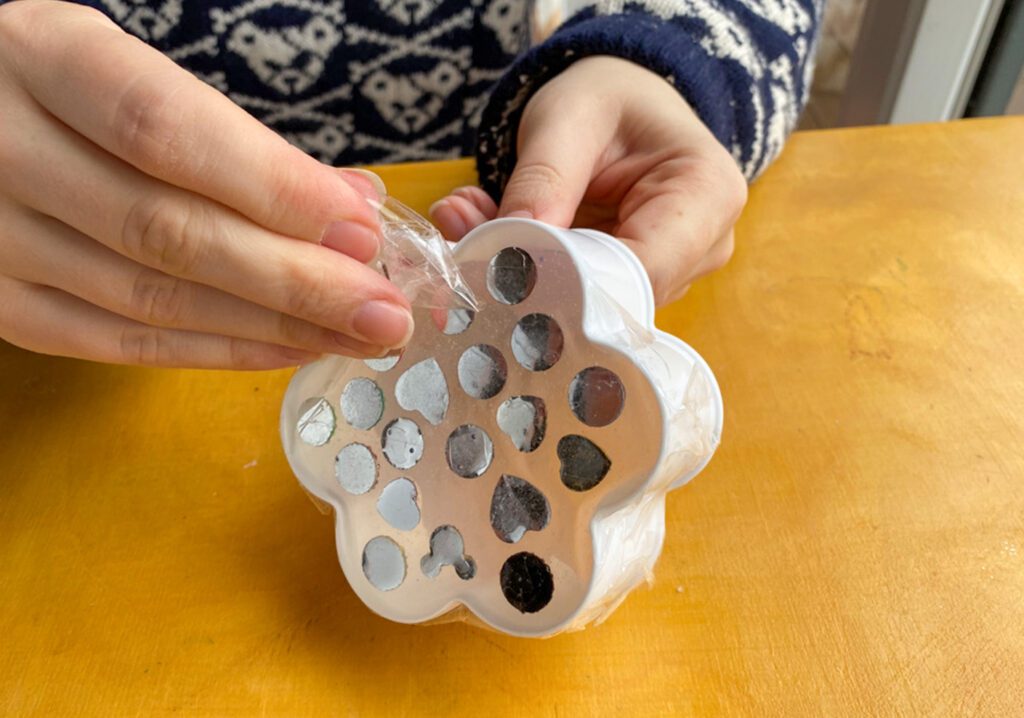
2 Create a mold box
Build a mold box around the object. Get a non-porous container to house the casting, such as something plastic with a flat bottom. You can also use a cookie cutter as housing instead of a container. Avoid picking a container that is much larger than the piece you are casting, as this will waste silicone rubber.
You can use cardboard, foam board, or even Legos to create the box. This will be the container for the silicone rubber.
If using a container, temporarily stick the item inside to stop it from moving and to prevent silicone from going underneath the item. Tape can be used, or hot glue or clay.
If using a cookie cutter, cover one end with sticky tape, completely sealing the edges, then place the item inside. The tape will help keep the item in place. Optionally, lightly spray mold release before pouring your silicone rubber. This might be useful depending on the material of the item(s) you are casting. Allow the mold release to dry for about 10 minutes.
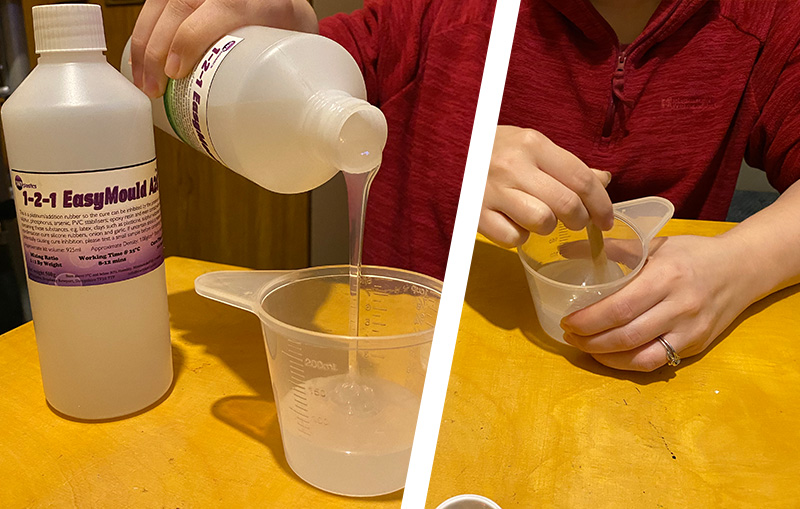
Once you have arranged your pieces in a way you are happy with, it’s time to mix the silicone rubber. Put on gloves and safety glasses/goggles, then grab a jug/cup and a mixing stick.
3 Mix the silicone rubber
Follow the instructions on the silicone rubber packaging to create the mold. This usually involves mixing two parts together, but some brands may differ. A 1:1 ratio silicone that sets clear in just under two hours is used in this tutorial.
Mix the silicone rubber in a well-ventilated area.
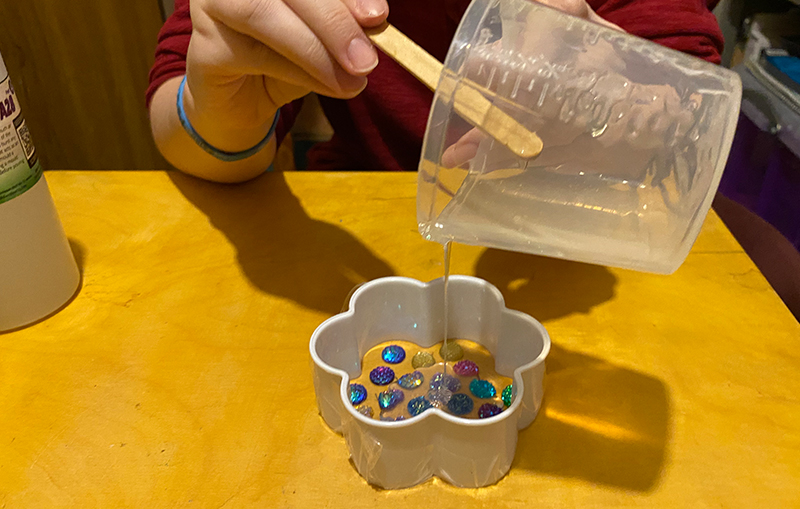
4 Pour the silicone rubber
Pour the mixed silicone rubber into the mold box. Make sure to fill it up to the desired level.
Keep a steady narrow stream in one place and aim for the base to help eliminate trapped bubbles, especially if your item has grooves. Cover it with at least one centimeter of silicone.
5 Let it cure
Leave your mould on a flat surface and preferably in a dust free environment to cure.
Allow the silicone rubber to cure for the recommended time. This can vary depending on the brand, but it usually takes around 24 hours.
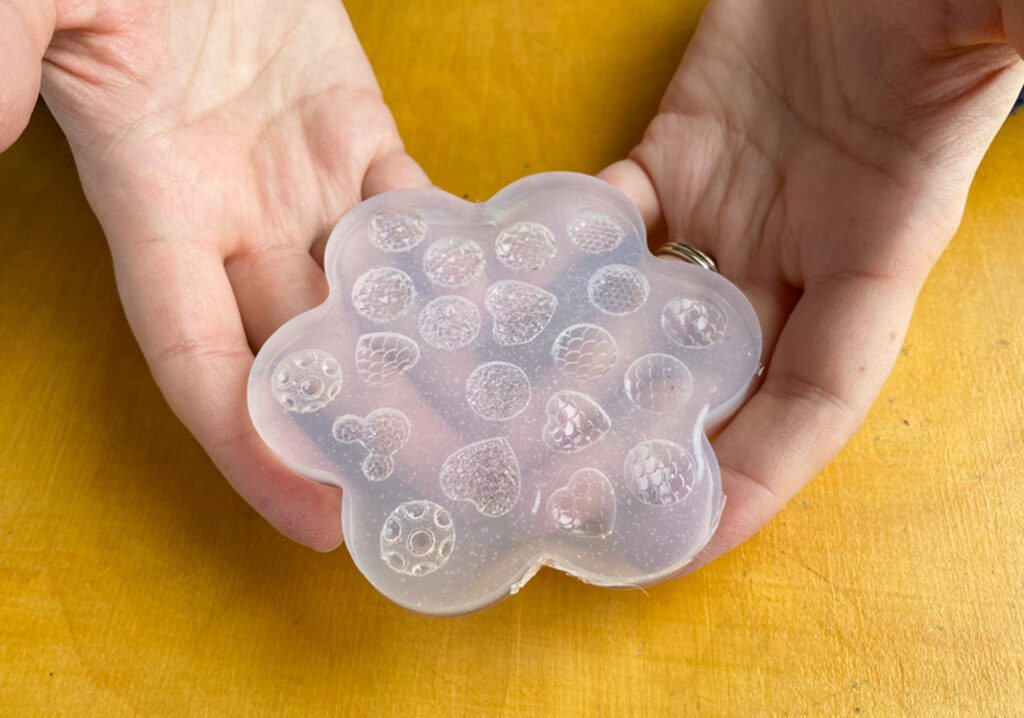
6 Remove the custom silicone mold
Once the silicone rubber has cured, carefully remove the mold box and your mold object(s). You should now have a custom silicone mold of your object.

Your Custom Silicone Mold
Your newly created custom silicone mold is now ready to cast with. You can now use this silicone mold to create replicas of your object.
Whether you want to make custom silicone molds for resin, or handmade silicone molds for other crafting projects, the possibilities are endless.
Designing your own custom silicone mold can be a fun and rewarding experience. With a little bit of creativity and some basic materials, you can create custom silicone molds that are unique to your project. So, get started and unleash your creativity with a custom silicone mold!
I hope you found this tutorial useful. I’d love for you to share the molds you create in our silicone mould addicts Facebook group.
Thanks for following along.
Making a Custom Silicone Mold FAQ’s
Can I use any type of silicone rubber for my mold, or are there specific types best suited for certain projects?
When selecting silicone rubber for mold-making, it’s important to consider the project’s requirements, such as flexibility, cure time, and clarity.
What are the best practices for storing custom silicone molds to ensure their longevity?
Silicone molds should be stored flat in a cool, dry place away from direct sunlight to maintain their shape and integrity. Find out more about caring for silicone molds.
How can I modify or repair a silicone mold if it gets damaged or if I want to change its design?
If a silicone mold gets damaged or needs modification, small repairs can be made with fresh silicone, although significant changes might necessitate creating a new mold.


