
I’ve always been fascinated by the art of creating beautifully scented and aesthetically pleasing wax melts with my silicone moulds. This craft allows you to explore endless possibilities and experiment with various wax melt ideas. In this article, I will share my knowledge and experience, guiding you through the process of making wax melts using some versatile silicone moulds.
What is the Most Popular Wax for Wax Melts?
When it comes to creating wax melts, choosing the right type of wax is crucial for achieving the best results. Soy wax is one of the most popular choices for wax melt making, for several reasons. Not only is soy wax natural and eco-friendly, but it also has a low melting point, which allows for a longer-lasting scent release. Additionally, soy wax is known for its excellent fragrance-holding capacity, making it perfect for wax melts.
What Silicone Moulds are Best for Wax Melts?
Wax melt moulds play a significant role in determining the final outcome of your creations. Silicone moulds are highly recommended for several reasons.
Firstly, they are flexible, making it easy to remove the hardened wax melts without any damage. Secondly, silicone moulds are available in a wide variety of shapes and sizes. This allows you to get creative with your wax melt designs.
Whether you want floral, geometric, or novelty shapes, silicone moulds offer endless options for your wax melt ideas. I’ve added a few links below to some of my favourites:

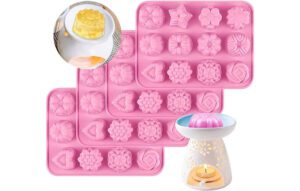
Mini Heart Silicone Mould
Buy now from Amazon ($6.99)
A great mould for making candles, chocolates and candies.
Flower Shapes Silicone Mould
Buy now from Amazon ($11.49)
These moulds are ideal for making handmade soaps and wax melts.
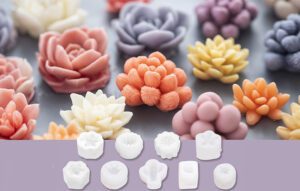
Adorable Succulent Silicone Mould
Buy now from Amazon ($14.99)
You get 9 individual succulent moulds which are perfect for making some mini scented candles
How Do I Make My Own Wax Melts?
Creating your own wax melts with silicone moulds is a delightful process. Here’s a step-by-step guide to help you get started:
Materials Needed:
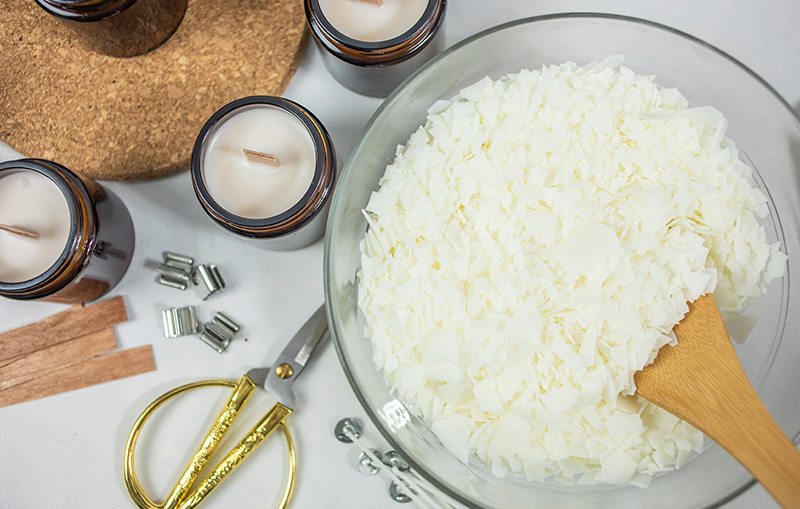
- 200g Soy Wax
- Silicone Wax Melt Mould (with six cavities)
- Liquid Candle Dye (colour of your choice)
- Fragrance Oil (scent of your choice)
- Digital Thermometer
- Heat-resistant glass measuring cup
- Stirring utensil (wooden spoon or popsicle stick)
- Kitchen scale
- Double boiler or microwave-safe container
Note: Ensure you have a clean, dry workspace and all the materials mentioned above before starting.
Step 1, Measure the soy wax
Using a kitchen scale, weigh out 200g of soy wax. This amount should be enough to make 6 wax melts in a six cavity silicone mould.
Step 2, Melt the soy wax
Option 1 (Double Boiler Method): Fill a saucepan with 100ml of water and place it on the hob/stove over medium heat. Put the heat-resistant glass measuring cup in the saucepan. Add the 200g of soy wax to the measuring cup.
Option 2 (Microwave Method): Place the 200g of soy wax in a microwave-safe container.
Melt the soy wax using your preferred method (double boiler or microwave) until it becomes completely liquid. Stir occasionally for even melting.
Step 3, Add colour
Check the recommended usage rate for your liquid candle dye. Typically, a few drops are enough for a small batch like this. Add the desired amount of liquid candle dye to the melted soy wax.
Stir well to ensure the dye is evenly distributed throughout the wax. If the colour is not strong enough, add more dye until you achieve the desired shade.
Step 4, Add a fragrance oil
Using a fragrance oil of your choice, add a few drops to the melted and coloured soy wax. The amount of fragrance oil will depend on the strength of the scent and your personal preference. For a 200g batch, 10-15 drops should be sufficient.
Stir the fragrance oil into the wax thoroughly, making sure it is well combined.
Step 5, Pouring the wax
Place the silicone mould on a flat, stable surface. If necessary, place the mould on a tray or cutting board for easy transport.
Once the coloured and fragranced wax has reached the ideal pouring temperature, typically between 50°C to 60°C (122°F to 140°F), carefully pour the wax into each cavity of the silicone mould.
Step 6, Removing the Wax Melts
Allow the wax melts to cool and set completely. Once the wax melts have solidified and cooled down, gently flex the silicone mould to release the wax melts. They should pop out easily.
If you encounter any resistance, wait a few more minutes before trying again.
If your silicone mould has wicks built into it, you can trim them to a suitable length using scissors.
Now you have made 6 beautiful and fragrant wax melts using a silicone mould.
Happy melting and enjoy the wonderful aromas in your home.
How Long Do You Leave Wax Melts in the Mould?
The time you leave your wax melts in the silicone moulds varies depending on the size and depth of the moulds and the ambient temperature.
In general, you should leave the wax melts in the moulds for at least 1 to 2 hours. However, to ensure they are fully set, it’s best to wait for the wax to cool and harden completely.
If you find that your wax melts are still soft or sticking to the moulds, give them a little more time to set.
How Do You Keep Wax Melts from Sticking to Silicone Moulds?
Preventing your wax melts from sticking to silicone moulds is essential for maintaining the integrity of your creations. To achieve a smooth release, follow these helpful tips:
- Use Quality Silicone Moulds: Invest in high-quality silicone moulds with a smooth surface. Cheaper moulds may have imperfections that can cause sticking.
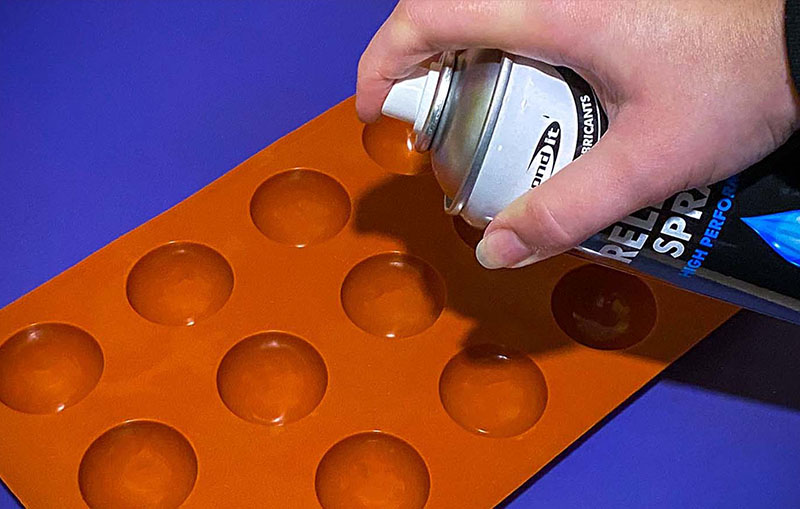
- Use Mould Release Spray: Before pouring the melted wax into the moulds, apply a light coat of mould release spray. This helps create a barrier and makes it easier to remove the wax melts later.
- Allow Proper Cooling Time: Ensure that the wax melts cool and harden completely before attempting to remove them. Rushing the process can lead to breakage and sticking.
- Gently Release the Wax Melts: To remove the hardened wax melts, gently flex the silicone mould to release the airlock, and carefully push the wax melts out from the bottom.
Creating wax melts with silicone moulds is a delightful and rewarding craft hobby. With the right materials, a splash of creativity, and a little patience, you can produce stunning wax melts that fill your space with captivating scents. So, unleash your imagination and start making your own wax melts to enjoy or gift to your loved ones. Happy crafting!


