
If you’re a fan of chocolate, you’ll know that there’s nothing quite like the taste and texture of a handmade chocolate treat. Using chocolate with silicone moulds is a fantastic way to make your own chocolates at home, as they allow for endless possibilities when it comes to shapes, sizes, and designs. Whether you’re a beginner or a seasoned chocolatier, this step-by-step guide to using a simple silicone mould for chocolate-making will help you create a delicious and beautiful chocolate creation with ease.
This guide will cover all the essential steps you need to know to make a stunning chocolate treat that is sure to impress your family and friends. So, grab your favourite chocolate and let’s get started!
Getting Started
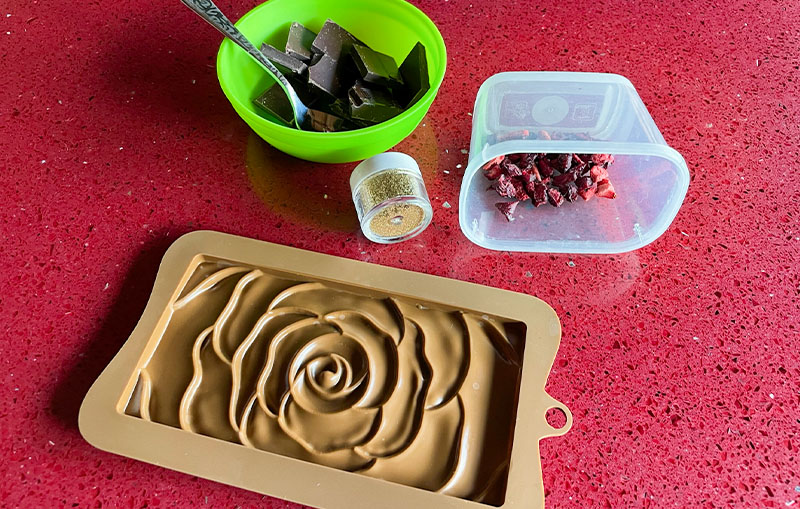
Heres what you will need to make your chocolate bar:
- A silicone mould
- At least 100g of your favourite chocolate
- Mixing bowl
- Dried fruit or some nuts (Optional)
- Spoons
- Microwave
- Edible glitter (Optional)
Choose the Right Mould
There are a variety of silicone moulds available, so choose one that suits your needs. Consider the size, shape, and design of the mould, as well as the type of chocolate you’ll be using.
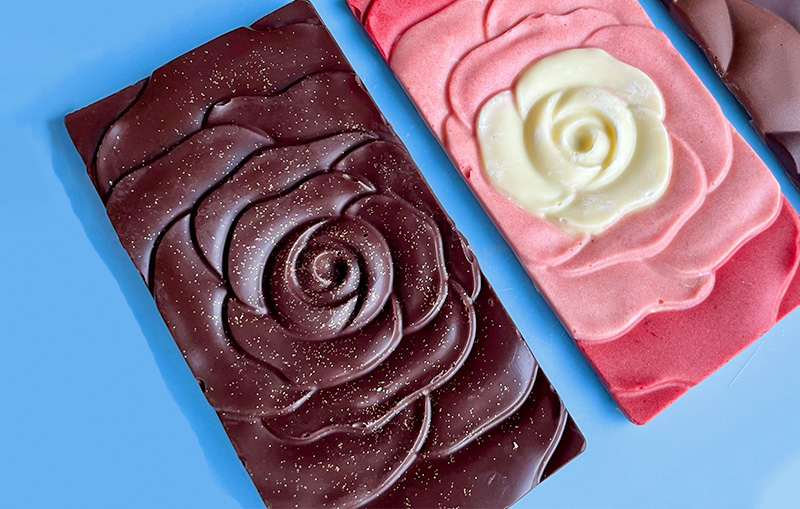
Choose a mould that is sturdy, food-grade safe, and easy to clean. For this guide I used a mould with a rose pattern, which is perfect for making a single 100g bar.

Rectangular Silicone Mould with Rose pattern
View on Amazon
Note: Before you begin, prepare the MouldBefore use. wash and dry thoroughly. This will make it easier to remove the chocolate from the mould You can brush the mould with a thin layer of vegetable oil or use a baking spray.
Check out these personalised chocolate bars using similar moulds and techniques
Step by step guide to making chocolate with silicone moulds
Melt the Chocolate
You can melt the chocolate in the microwave. Simply place the broken up chocolate in a microwave-safe bowl and heat it in 30-second increments, stirring after each interval until it’s fully melted.
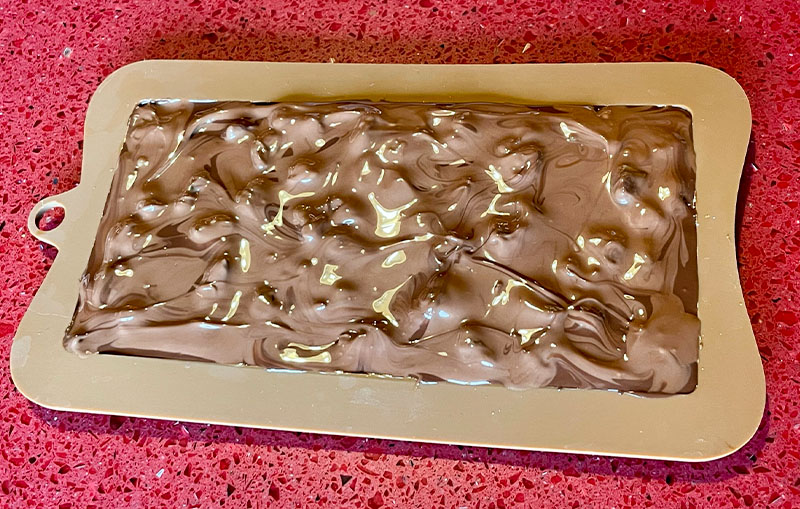
Fill the Mould
For my chocolate bar, I’ve sprinkled some edible glitter into the mould before I start to pour the chocolate. This will give it a nice sparkly top.
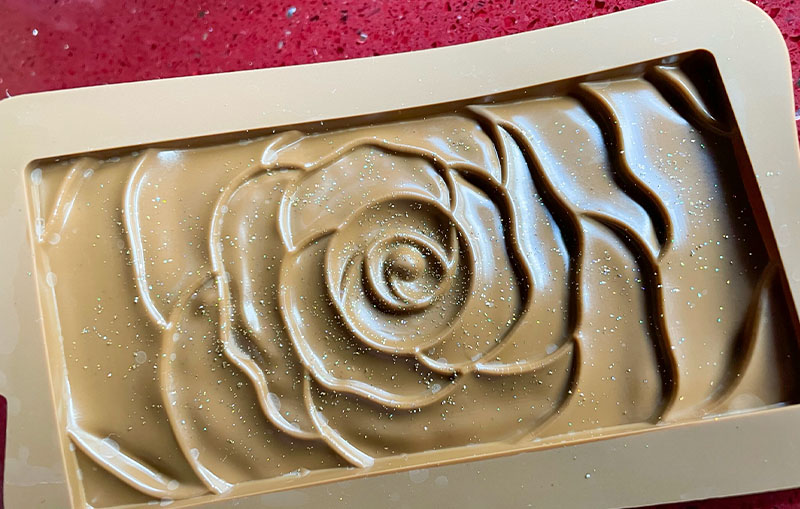
Use a spoon to fill the mould with the chocolate. Fill the mould to the top, then tap the mould gently to remove any air bubbles.
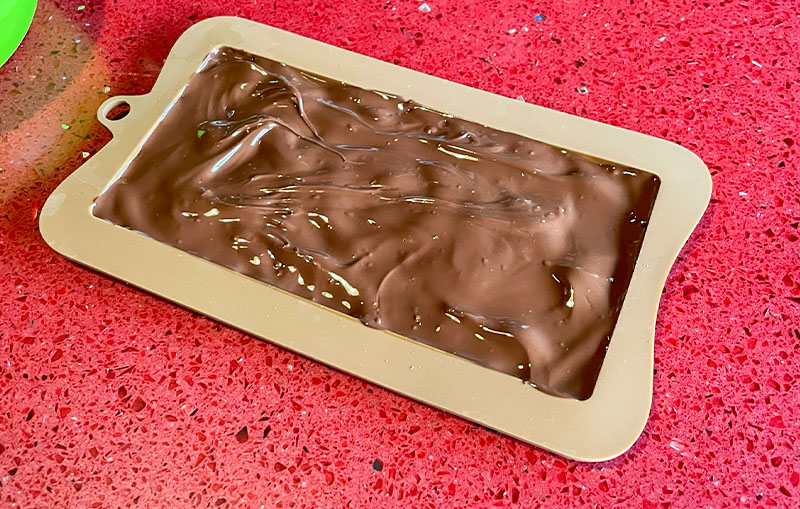
Next I sprinkled some dried cherries into the chocolate. (Feel free to get creative here)
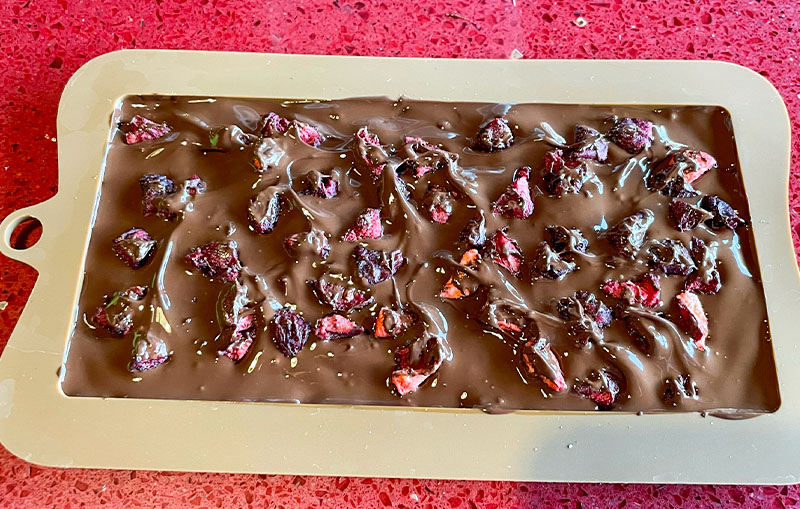
Finally I covered the chocolate and dried cherries with a layer of milk chocolate.
Set the Chocolate
Once the mould is filled, transfer it to a cool environment. I don’t recommend placing in a fridge to set as this can cause some chocolate to discolour.
The time it takes for the chocolate to set will depend on the size and thickness of the chocolate, but it typically takes between 30-60 minutes.
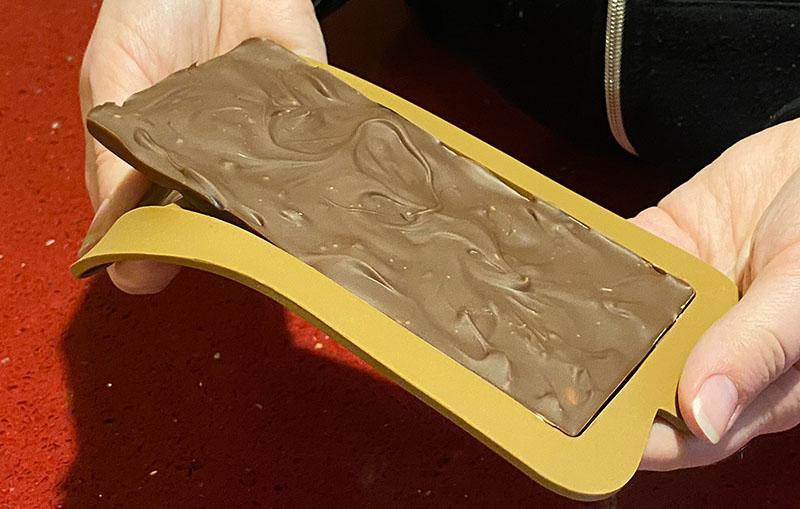
Remove the Chocolate
Once the chocolate has set, gently flex the mould to release the chocolate or invert it onto a flat surface and gently tap the back of the mould.
Store the Chocolate
Once the chocolate has been removed from the mould, store it in an airtight container in a cool, dry place. You can also wrap it in foil or cellophane to preserve freshness.
Thank you if you have been following along. With these simple instructions, you can create beautifully shaped and delicious chocolates using silicone moulds. Enjoy!


