
In this beginners guide to using Epoxy Resin, you’ll discover:
- An understanding of what Epoxy Resin is
- The benefits of Epoxy Resin for beginners
- Safety Precautions with Resin
- Using Epoxy Resin and Silicone Moulds
- Tips and tricks
- Common mistakes to avoid
Understanding Epoxy Resin

Before we explore its suitability for beginners, let’s first understand what epoxy resin is. Epoxy resin is a versatile and strong polymer. When combined with a hardening agent, it undergoes a chemical reaction, resulting in a solid, transparent, and shiny material.
However, what truly distinguishes epoxy resin is its adaptability. This outstanding quality makes it appropriate for a wide range of uses.
Versatility in Various Crafts
Epoxy resin’s versatility extends to many crafts. For example, in jewellery making, it can elegantly encase delicate gemstones, dried flowers, and even tiny gold flakes. These elements can be turned into captivating pendants and rings, resembling miniature worlds frozen in time. Epoxy resin also greatly benefits the world of home decor. Coasters, trays, and even tabletops, all with a glass-like finish, create stunning pieces that enhance interior spaces.
A Blank Canvas for Creativity
Moulding and shaping epoxy resin into different forms is just the starting point. It seamlessly combines with pigments, dyes, and additives, allowing you to create vivid and imaginative designs. From ocean-inspired waves captured in time to entire galaxies encased in a pendant, epoxy resin serves as a medium to bring limitless imagination to life.
Benefits of Epoxy Resin for Beginners
Epoxy Resin is Easy to Use
Unlike some resins that require exact mixing ratios, epoxy resin is more forgiving in this aspect. Even a small deviation in the mixing ratio won’t necessarily ruin your project. This forgiving nature lets you focus on improving your crafting skills without getting overly concerned about tiny details.
Plenty of Time for Experimentation
One of the main benefits of epoxy resin is its longer curing time. Unlike fast-setting resins that demand quick and precise work, epoxy resin gives you more time. This extended curing period provides a chance for experimenting and making adjustments.
Whether you’re carefully arranging items in a mold or trying out different color combinations, epoxy resin’s relaxed curing time ensures you have the time needed to perfect your craft without feeling rushed.
Safety Precautions
Safety should always be your top concern. While crafting can be incredibly enjoyable, it’s crucial to exercise caution. This not only safeguards your well-being but also maintains the quality of your creations.
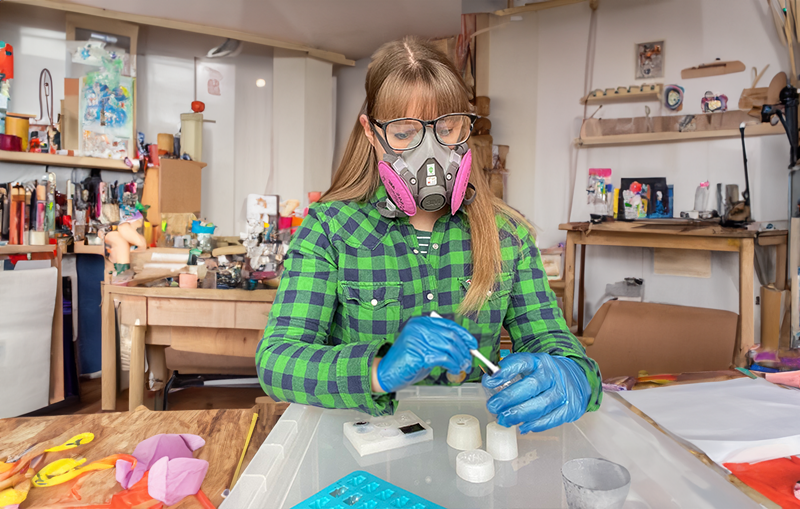
Ensuring Adequate Ventilation and Using Protective Gear
When you’re working with epoxy resin, it’s vital to focus on proper ventilation. Epoxy resin releases fumes as it cures, and inhaling these fumes excessively can lead to discomfort and health issues.
To address this, it’s recommended to set up your crafting area in a well-ventilated space. You can also consider using exhaust fans to help disperse these fumes, creating a safer working environment.
Furthermore, using the right protective gear is essential. Wearing gloves and a mask provides a barrier that shields you from direct contact with the resin and reduces the risk of inhaling harmful fumes.
Always keep in mind that giving priority to safety not only ensures a more enjoyable crafting experience but also contributes to the long-term sustainability of your creative pursuits.
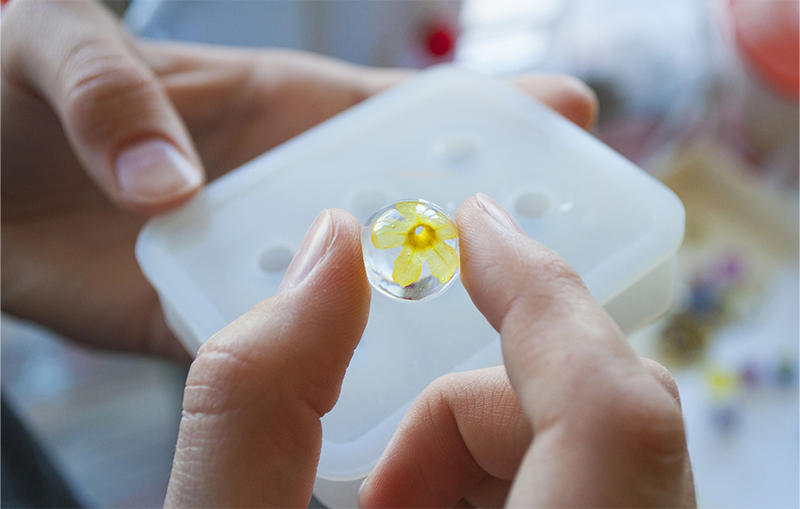
Epoxy Resin with Silicone Moulds

One of the best combinations in the crafting world is between epoxy resin and silicone moulds. These two materials complement each other seamlessly, giving you a gateway to a world of endless possibilities.
Epoxy resin and silicone moulds collaborate harmoniously to create intricate shapes with ease. Silicone moulds, known for their flexibility and details, offer an effortless way to mould epoxy resin into intricate forms.
Unique Silicone Moulds for Resin Crafts
Intrigued by the combo of epoxy resin and silicone moulds? Check out some unique silicone moulds for resin crafts to uncover a treasure trove of designs. There are some amazing websites out there with an large collection of high-quality, unique silicone moulds for resin.
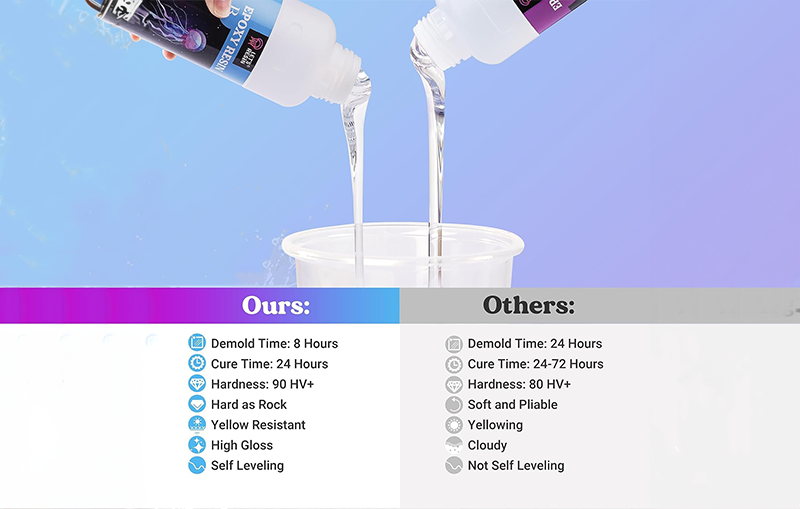
Epoxy Resin from Let’s Resin
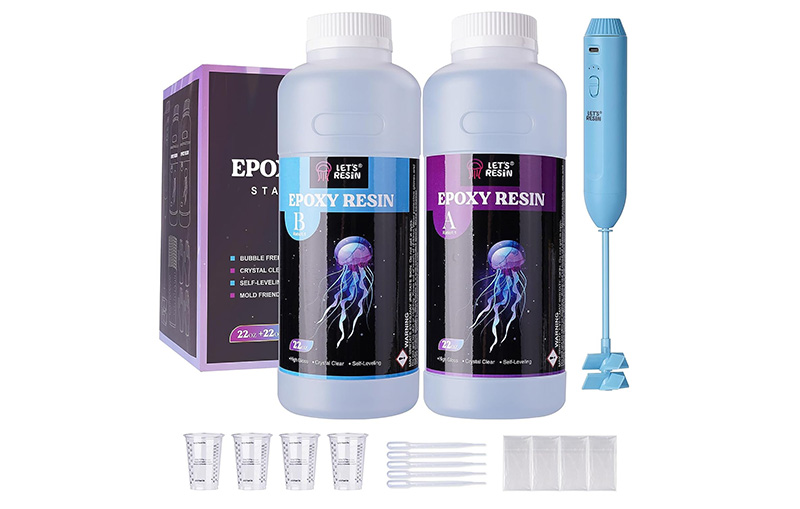
Let’s Resin has the perfect Epoxy Resin kit for beginners. You get so much in this kit including, two 22 ounce bottles of A & B resin, 10 measuring cups, 2 sets of gloves, 3 pipettes and an electric mixer. The mixer is charged and ready to go. It’s easily recharged with a USB cable, and has adjustable speeds. The resin itself is super clear and gives you around 45-50 minutes before it hardens. Great for beginners
- Buy now from Amazon ($40.99)
Tips and Tricks for Successful Epoxy Resin Crafting
Enhancing your resin crafting abilities doesn’t need to be complex. Here are some useful tips to help you achieve a polished and expert appearance
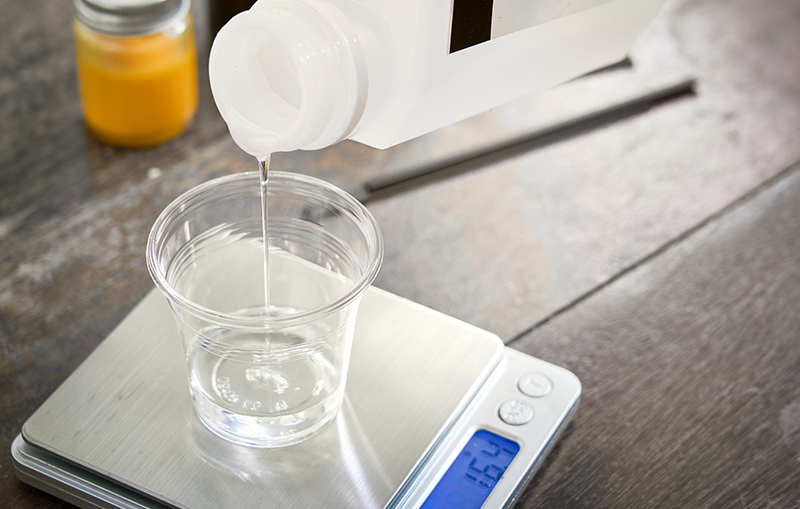
Accurate Measurement and Mixing
To ensure consistent outcomes in your epoxy resin projects, precision is key. For accurate results, use measuring cups with clear markings. This guarantees the right resin-to-hardener ratio.
Dealing with Air Bubbles
While air bubbles can pose a challenge, there’s a method to reduce them. To achieve this, gently stir your mixture and avoid creating unnecessary turbulence. After pouring the resin into your mould, a quick pass with a heat gun or torch can eliminate any remaining surface bubbles.
Creating Depth through Layers
To add depth and a three-dimensional effect to your resin pieces, consider layering. You can do this by applying different colours or elements in stages. Remember to let each layer partially cure before adding the next, ensuring clean lines between them.
Experimenting with Pigments and Additions
Let your creativity shine with pigments, dyes, and other additives. Trying out various combinations can lead to stunning effects. Keep in mind that sometimes a touch of colour or sparkle can significantly enhance the appeal of your piece.
Embracing Imperfections
Keep in mind that crafting is a journey of progress. Don’t stress over minor mistakes; they offer opportunities for learning and growth. Each piece you create carries a unique story, and even slight imperfections can add character to your work.
Achieving the Perfect Finish
For that professional touch, sanding and polishing are crucial steps. Gradually use sandpaper with varying levels of grit to smooth the surface and eliminate imperfections. To enhance the shine and protect your creation, a coat of clear varnish can work wonders.
Common Mistakes to Avoid
One mistake to steer clear of is rushing the process. The slow curing time of epoxy resin is actually a benefit, not a drawback. Don’t rush through the steps. Impatience might lead to disappointing results. Take your time when mixing, pouring, and curing the resin.
Safety should always come first. It’s crucial to have proper ventilation and wear protective gear while working with epoxy resin. Ignoring these precautions can put your health at risk and cause discomfort.
Filling the mould right to the top might be tempting, but it’s better to resist. Overloading the mould can cause excessive heat buildup and uneven curing. Follow the recommended pouring depths for better outcomes.
A mistake you’ll want to avoid is inadequate mixing. Incomplete mixing can result in uneven curing and a sticky surface. Make sure to thoroughly stir the resin and hardener. Scrape the sides and bottom of the mixing container to ensure a complete blend.
Before you pour resin into a mould, take a moment for surface preparation. Make sure the mould is clean and free from any dust or debris. This simple step helps prevent imperfections from forming on the surface of your finished piece.
By being mindful of these common mistakes, you can work with epoxy resin more effectively and achieve better results.
In your resin crafting journey, learning from these tips and avoiding common mistakes will contribute to your growth. With each creation, you’ll refine your techniques and develop your unique style, making your mark in the world of resin artistry.


