
I’m excited to share some fun tips on using polymer clay molds! If you love crafting and experimenting with new techniques, you’re in for a treat.
Working with silicone molds for clay opens up endless creative possibilities, and I’m here to help you make the most of it!
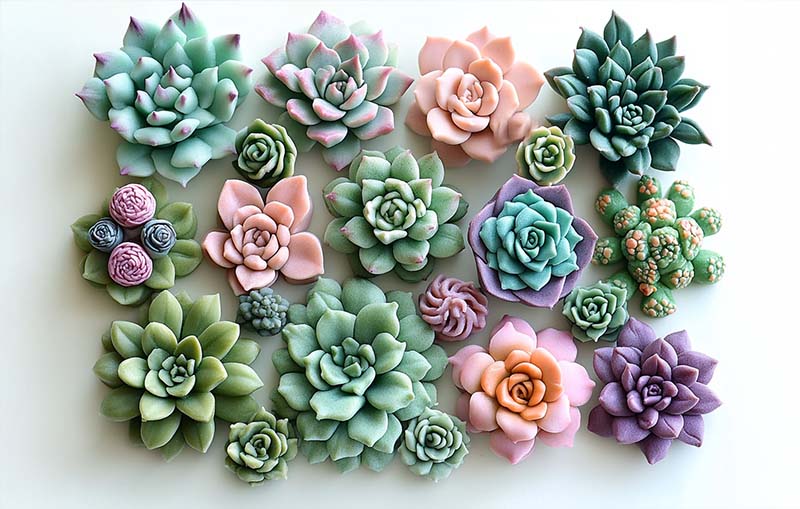
One of my absolute favorite polymer clay molds is one I use often, inspired by tiny succulents I used it for a past project. It has nine cavities, so you can create multiple adorable little succulents at once.
In this post I’ll be sharing some expert clay molding tips to help you avoid common mistakes and get the best results possible.
No products found.
Avoid These Common Polymer Clay Molding Mistakes!
Using polymer clay molds is such a fun way to shape clay, but trust me—there are a few sneaky mistakes that can trip you up! Here’s what to watch out for:
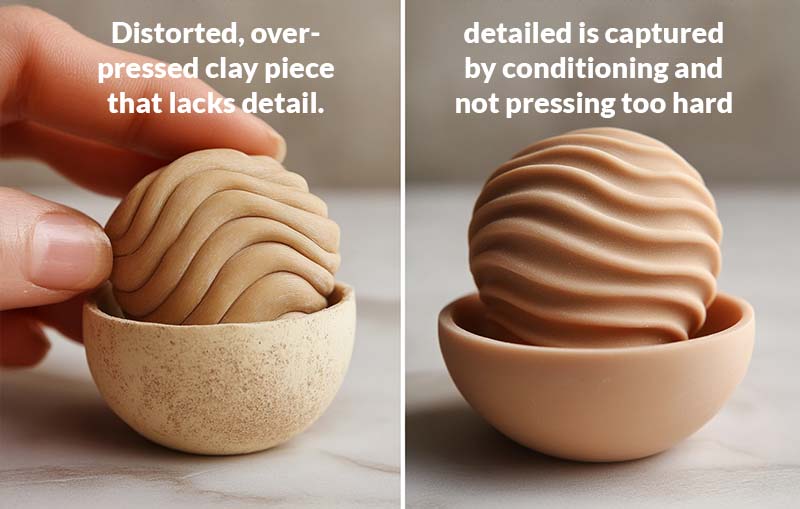
🛑 Skipping Clay Conditioning
If you don’t properly condition polymer clay, it can be stiff and crumbly, making it harder to pick up fine details. Always knead and warm your clay before using it! Learn more about choosing the right clay to get the best results.
🛑 Jamming Clay Into the Mold
Rolling your clay into a tight ball and cramming it into the mold might seem like the easiest approach, but it can actually warp the shape and blur the details. Instead, consider making a custom silicone mold for better control over your designs.
🛑 Pressing Too Hard
If your fingers start turning red, you’re pressing too hard! Too much pressure can lead to flat, rounded edges instead of crisp, detailed shapes when demolding polymer clay.
Pro Techniques for Achieving Detailed Polymer Clay Creations
Want to level up your polymer clay molding skills? Follow these easy steps for flawless, detailed clay pieces:
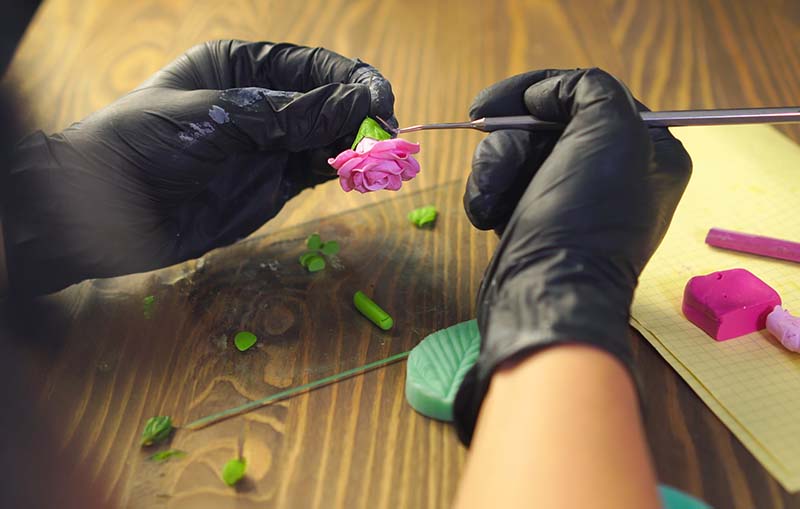
✨ 1. Use the Right Tools for Polymer Clay Molds
A stainless steel ball tool (like the ones in this set of tools) is perfect for pressing clay into tight spots and enhancing detail. Silicone-tipped sculpting tools are also fantastic for refining intricate areas. Check out essential tools for mold making to see which ones will elevate your crafting experience.
✨ 2. Condition & Prep Your Clay
Take a small piece of clay (I love using lime green Fimo for succulents!) and warm it up by rolling it back and forth in your hands. This makes it much easier to work with and helps it take shape properly in the polymer clay molds.
✨ 3. Press, Don’t Cram!
Gently press small amounts of clay into the mold one layer at a time. Use a sculpting tool or even the end of a pencil eraser to make sure it fills all the tiny details.
No products found.
✨ 4. Layering Trick for Better Detail
Once the first layer is in place, add another thin layer on top and continue pressing. This ensures that every nook and cranny is fully filled without trapping air bubbles.
✨ 5. Gentle Squeeze Before Demolding Polymer Clay
Once the mold is full, give it a little squeeze around the edges—this helps it bounce back into shape and makes demolding polymer clay a breeze!
✨ 6. Careful Demolding for Perfect Results
Slowly peel back the mold to reveal your masterpiece! If needed, refine any edges before baking.
✨ 7. Final Touches Before Baking Polymer Clay
If you spot any tiny imperfections, now’s the time to smooth or adjust them before your piece goes into the oven.
Let’s Get Crafty with Polymer Clay Molds!
Molding with polymer clay molds is such a rewarding process, and with a little practice, you’ll be creating stunning, detailed polymer clay creations in no time! Whether you’re making succulents, floral designs, or intricate textures, the key is patience and technique.
💡 Bonus Tip: Try using silicone-tipped sculpting tools to refine your details even further! They’re super handy for getting into those tiny, delicate areas.
If you’re ready to take your skills to the next level, check out this advanced polymer clay project for a fun challenge!
I hope these polymer clay techniques help you feel more confident in your molding journey! Keep experimenting, have fun, and don’t be afraid to try new things.
No products found.


